In this article, you will learn:
To add a new client, prospect, or just a carrier contact you can leverage the Contacts navigation tab.
Contacts fall under five different categories, including Active customers, Inactive Customers, Prospects, Others, and Leads. These can be selected individually or all together from the individual tabs on the top of the screen.
To add multiple contacts, you can follow the steps below.
User Interface change in add and edit contact :
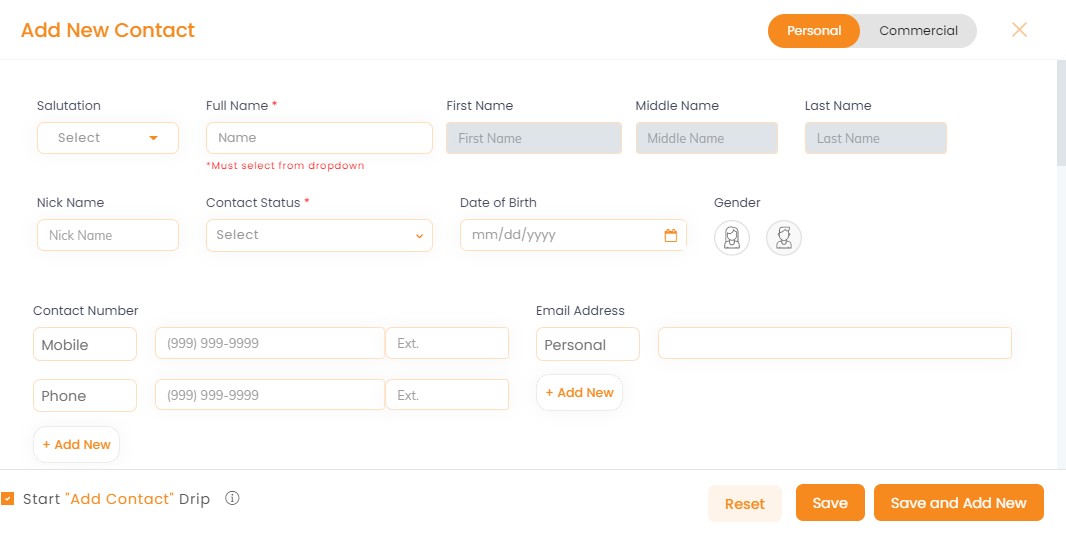
A smart new interface appears while adding and updating contacts. It provides for easy, single scroll functionality to view all fields categories in one screen. A seamless continuous display helps you work more efficiently ruling out the back and forth of jumping through multiple screens.
Login to your InsuredMine account, and then click on the Contacts from the navigation panel on the left-hand side. Then click on the tab and click on the Upload data button located on the top right-hand side to upload a CSV file with a list of new contacts to add.
2. If you want to add individual contacts, please see below:
Within the Contacts module, click on the Orange + Add New on the top to add a Contact

Add all the required details.
3. Click on the Save or Save and Add New button to add a new contact
Enhancement: March 2021
Enhancement: January 2021
All contacts filter in 2nd stage and onward in email campaigns
Now while setting up an email campaign from 2nd stage onwards you can even set the automation for all contacts ( total recipients as set in stage 1).
Use case: If you have set a promotional email in the 1st stage to ten prospects, and in the 2nd stage of the automation campaign, you want to send another promotional mail to all the contacts whom you have shared previously, you can do that.
To check the enhancement:
- Navigate to engagement module
- Click on create button in Email Campaign section
- Click on add new stage(2nd stage) from left panel
- Scroll down to the 2nd stage section, you will be able to set all contact filters. For this click on the drop down icon beside ‘who have’ section and select All.

Note: If the campaign is created under the live list then the contacts data will be dynamically calculated otherwise, the count of recipients will match with the stage 1 recipients’ list.
Enhancement: January 2021
Previously shared feature in tags
- A window will open to add a new contact.
- Scroll down to Add Tags
- Click on the edit icon
- Select the agents with whom you want to share the tags with
- Click on update
- Search the tag that you recently shared.
- You can find the previously shared tag beside the agent’s name with whom the Tag has already been shared.


