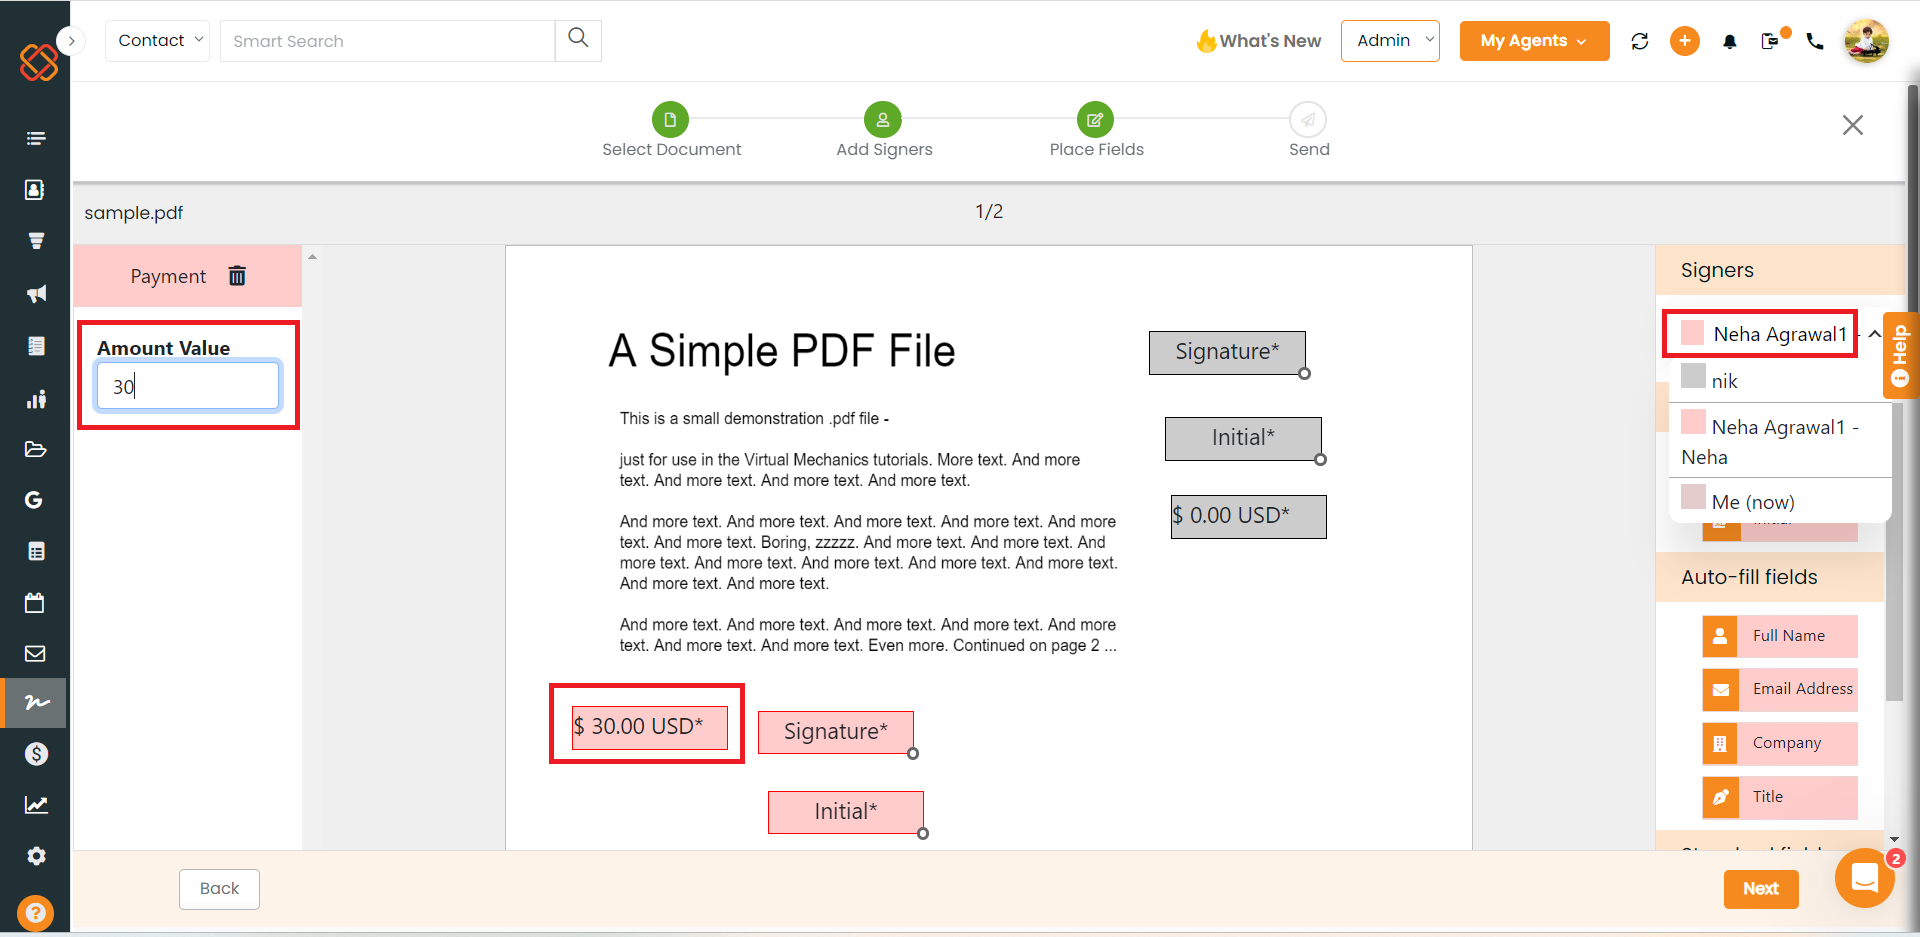
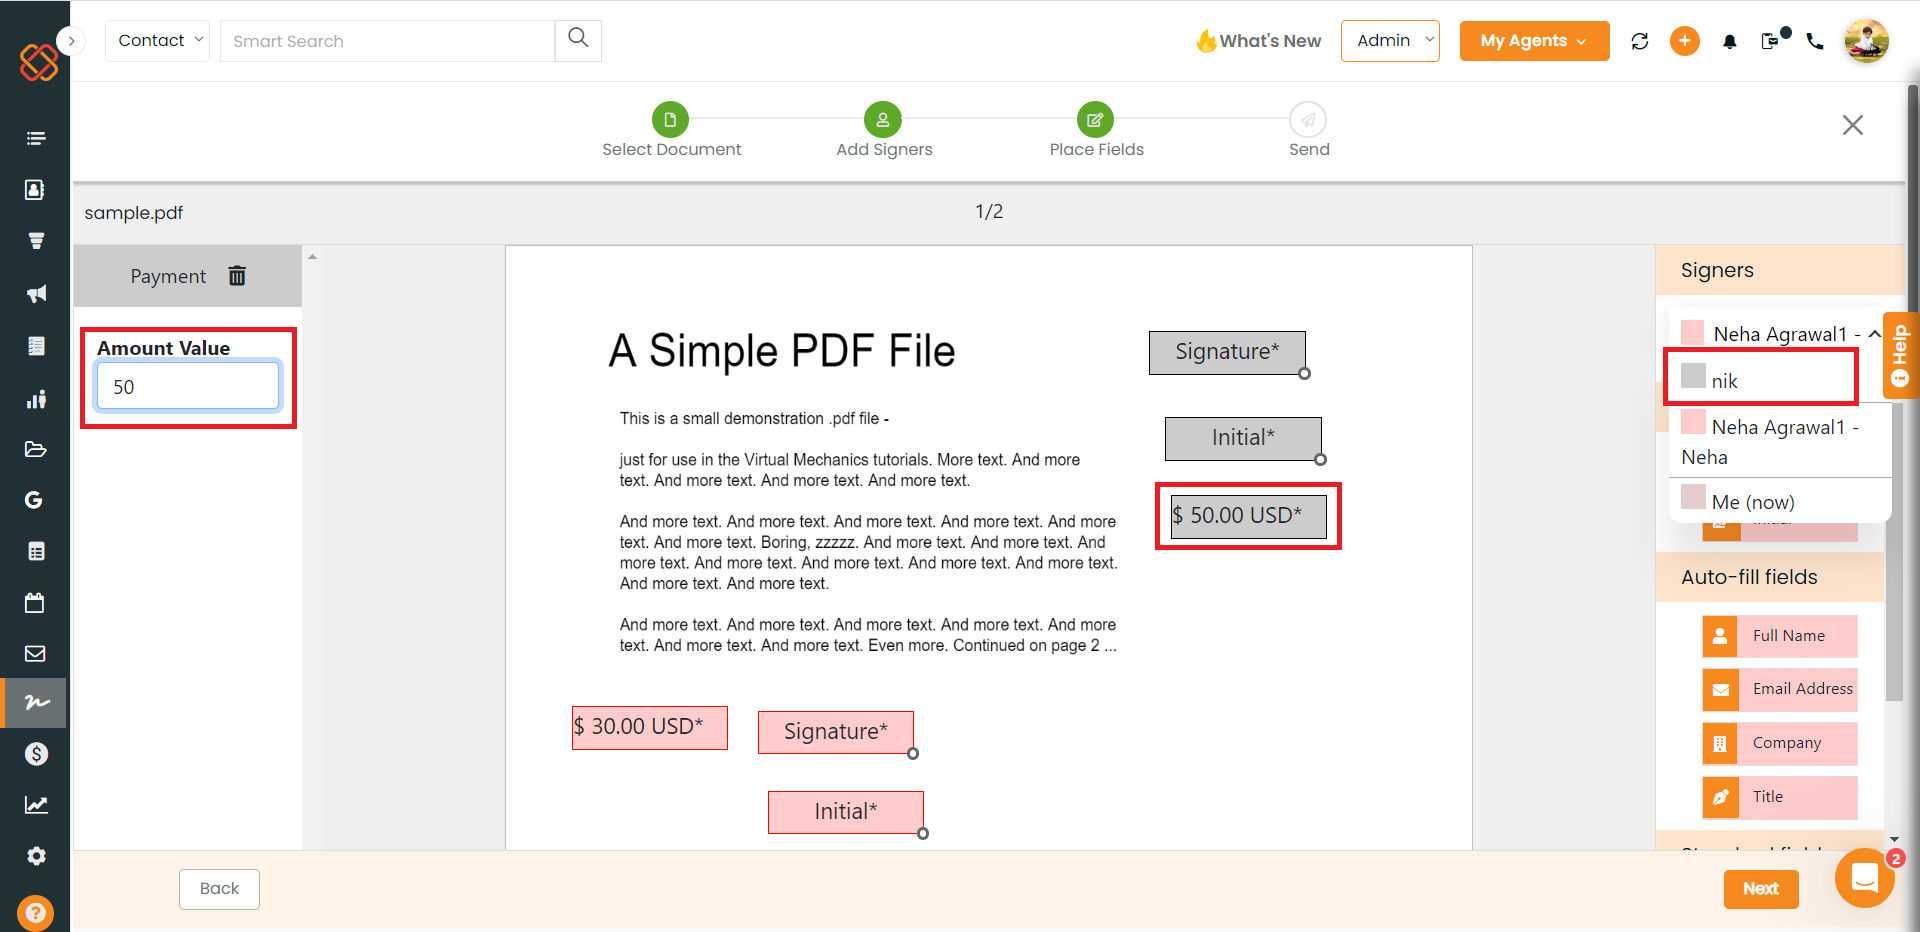
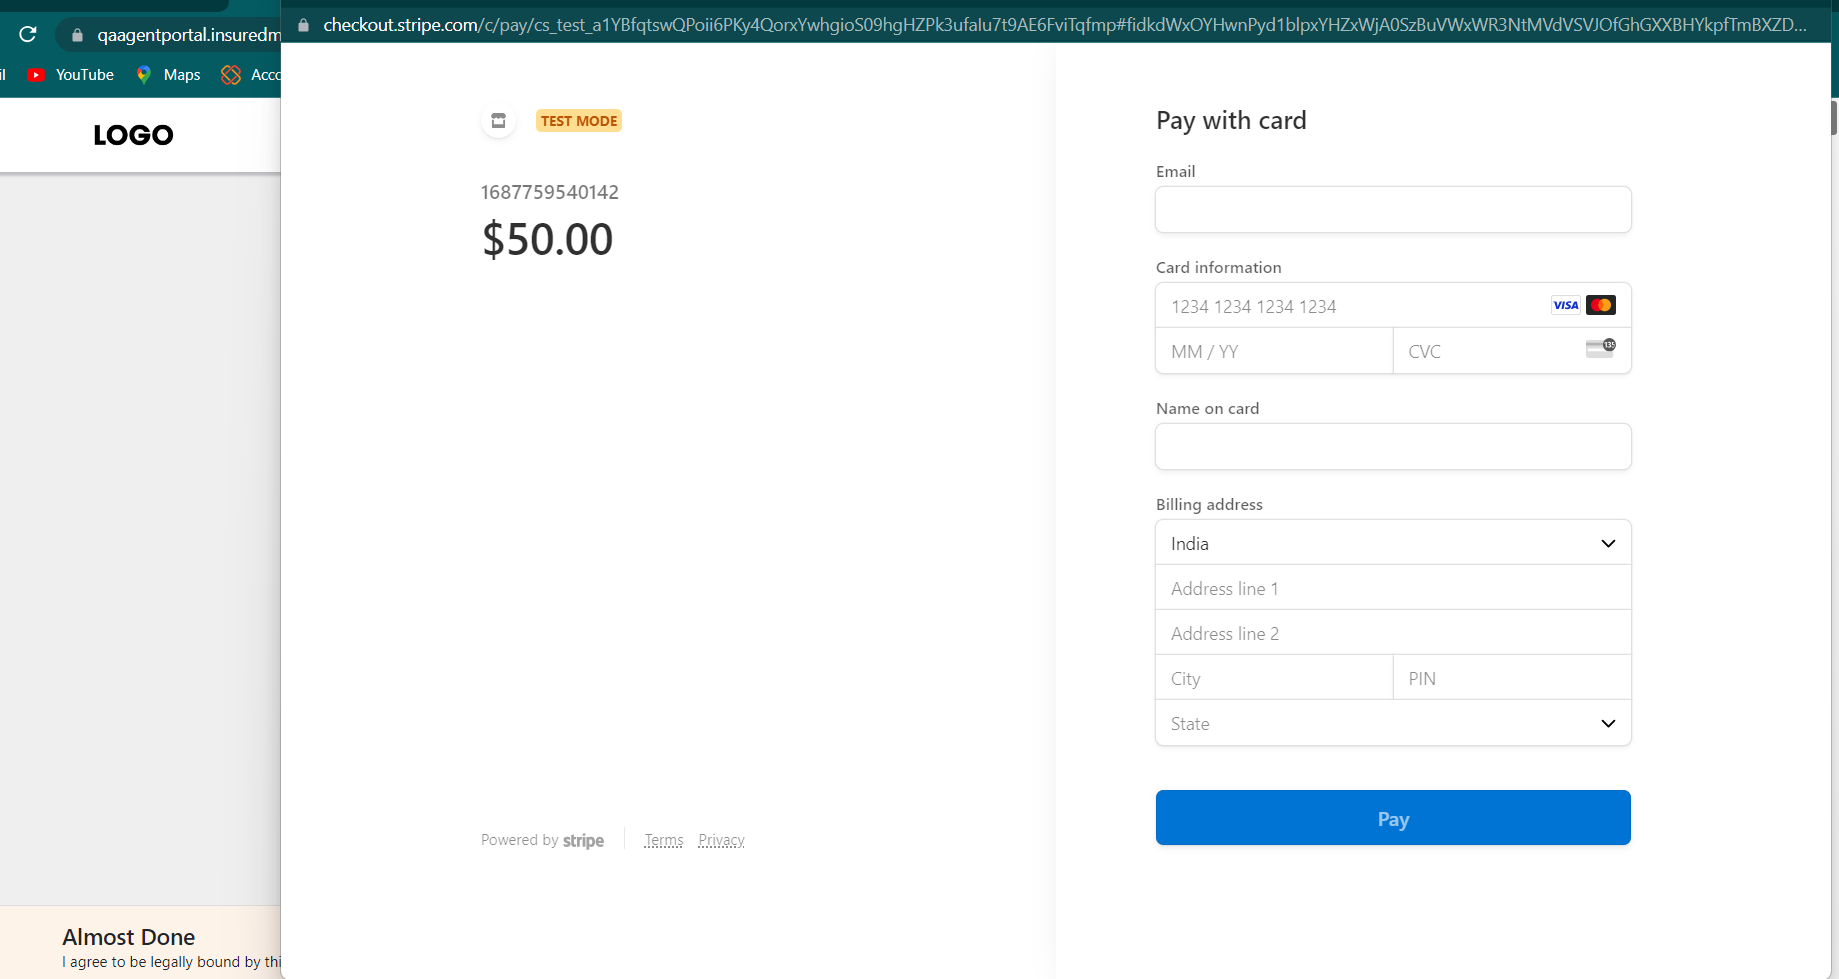
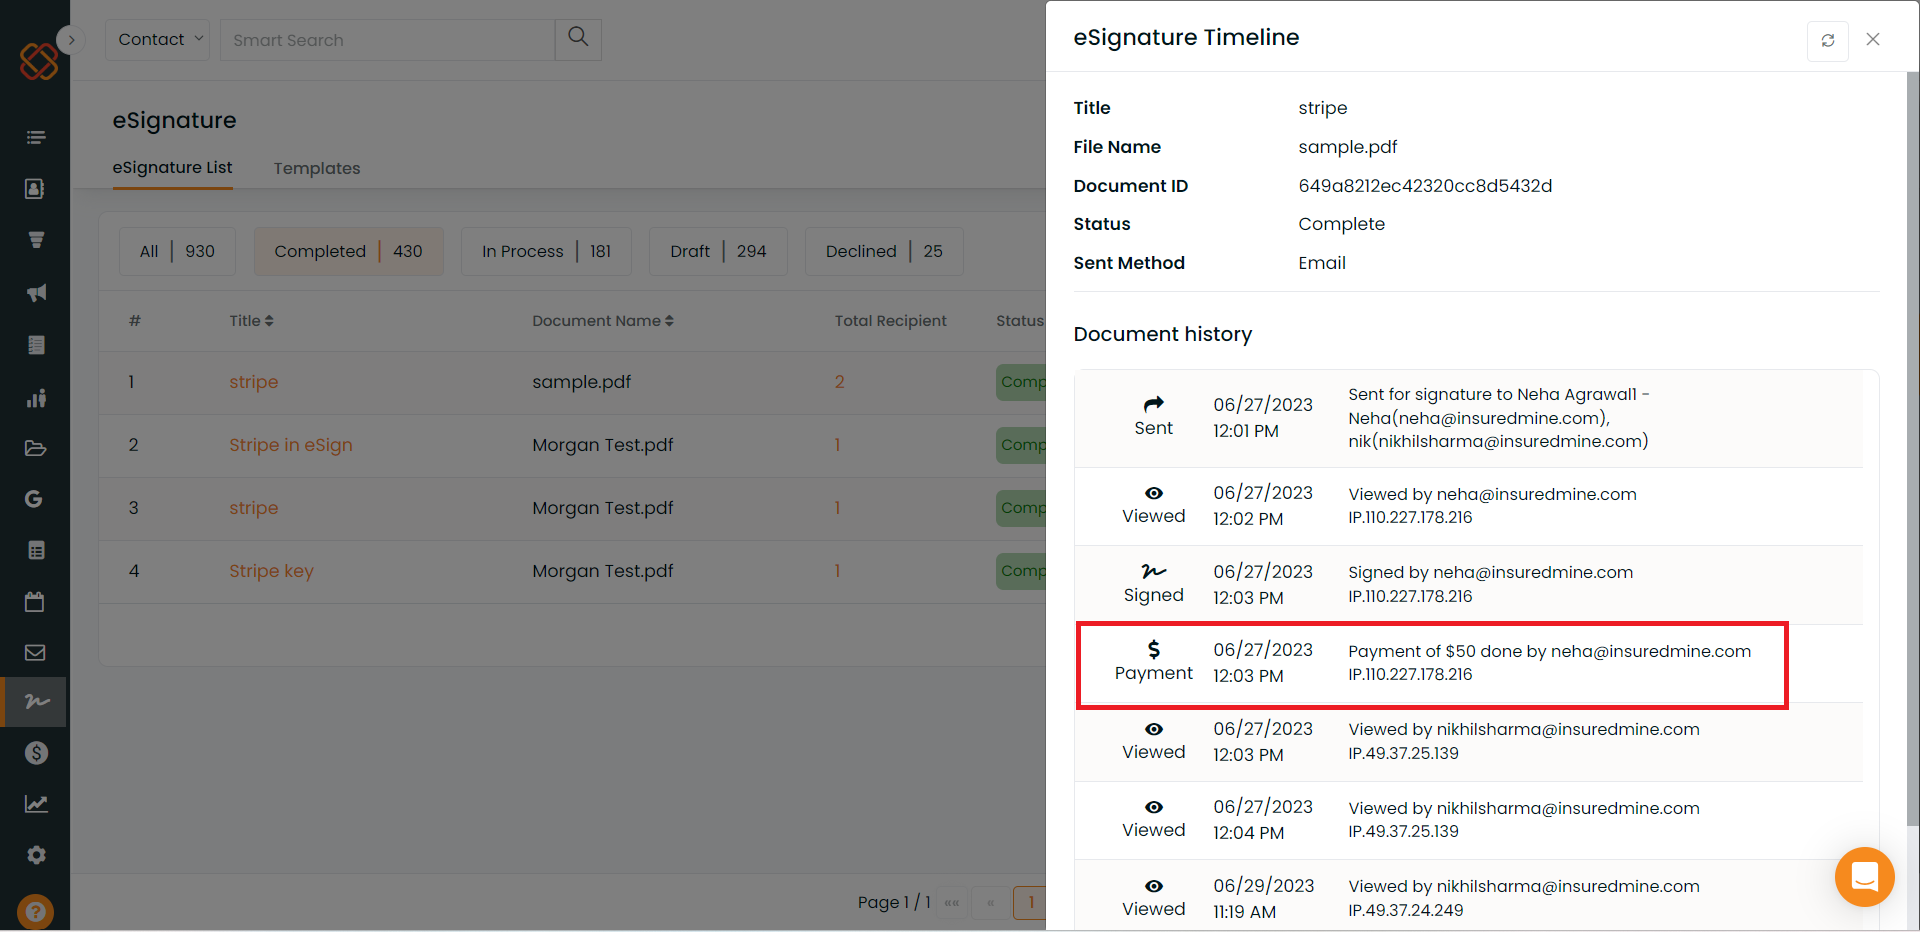
Description: We can now send the payment request to the client via eSignature for any documents.
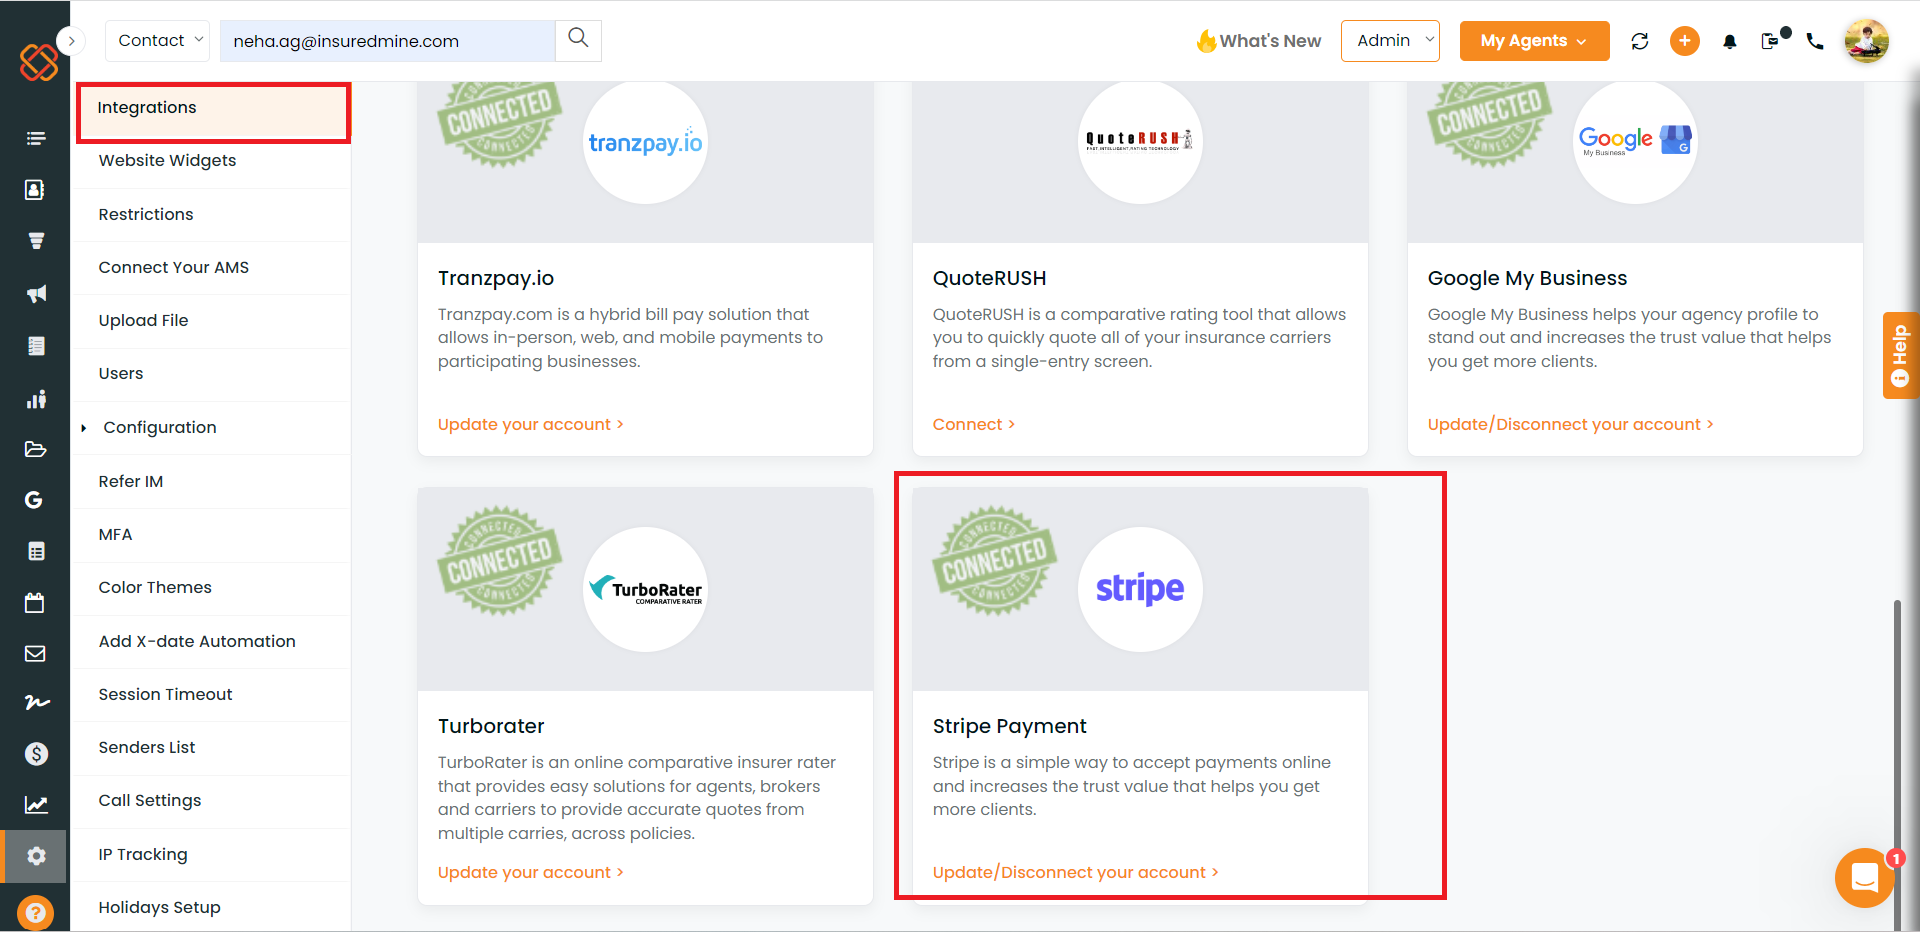
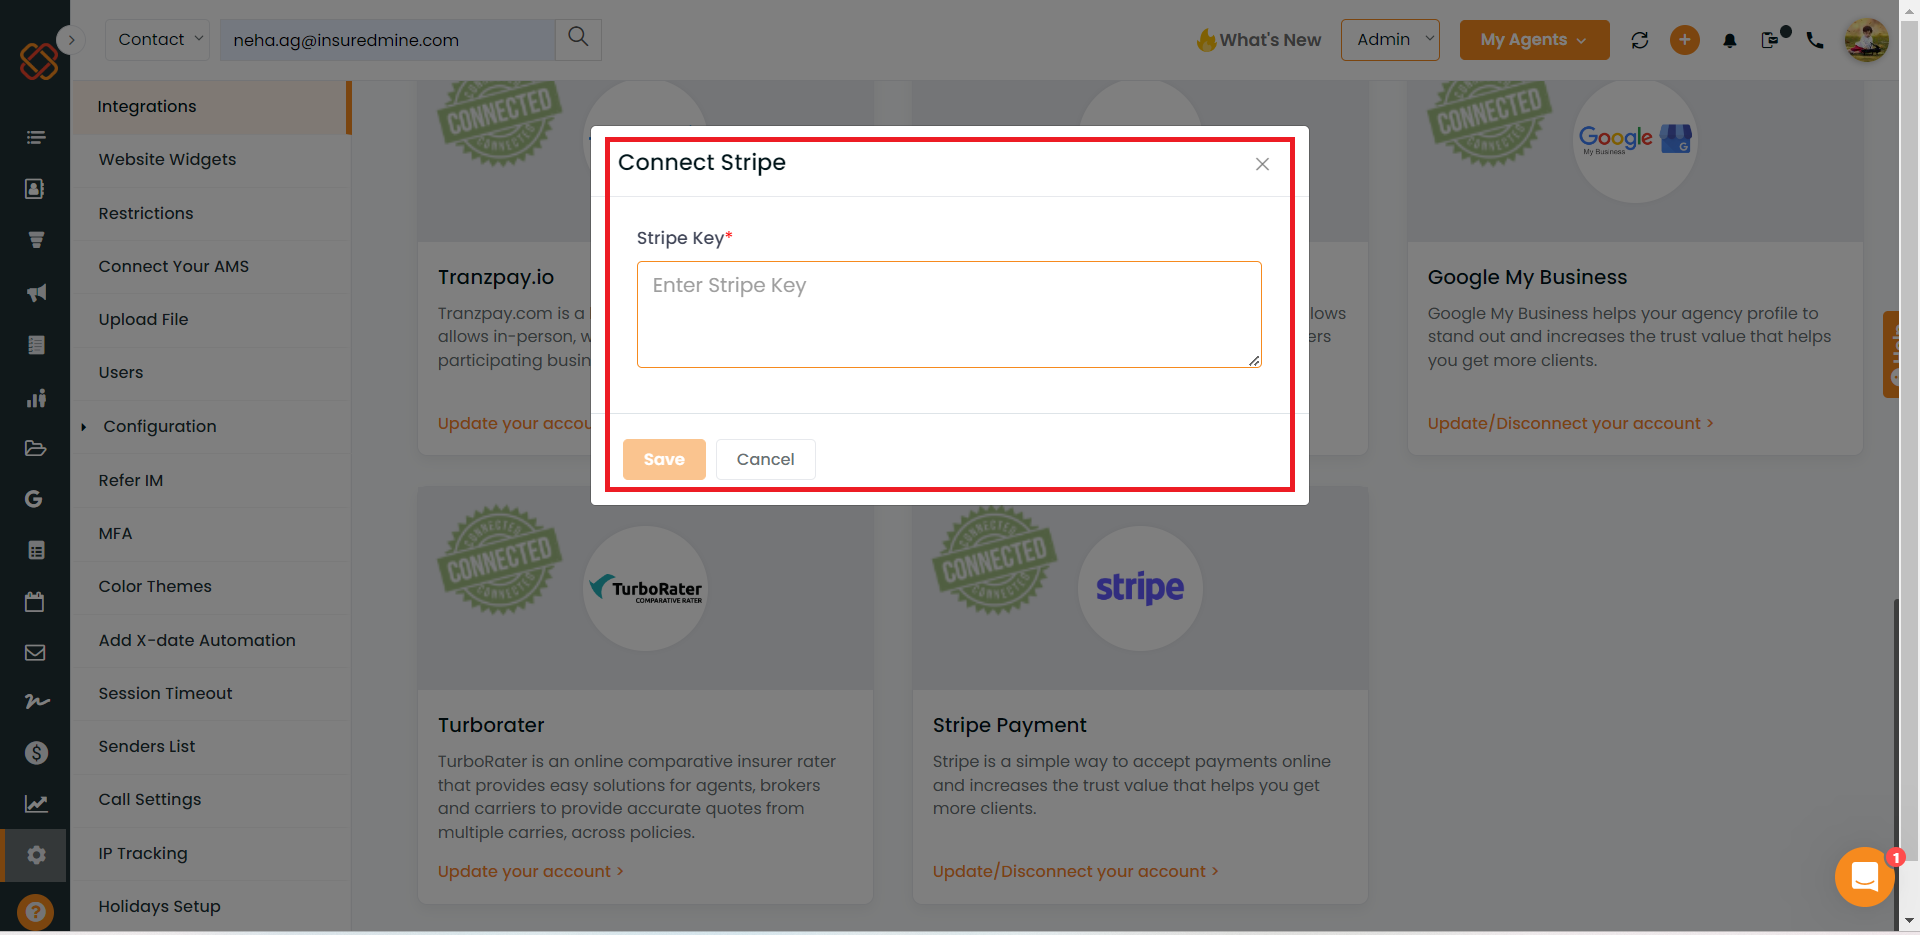
Navigation –Â
- Navigate to the settings
- Click on the stripe payment to enter your stripe key and save it.
- Then Navigate to the eSignature module
- Add a document for eSignature
- In the add field page you will get an option to add stripe
- Add stripe field and enter the amount
- Then Send for eSignature to the signers
Note: We can add stripe field only once per each signer
- Once the document has been sent for eSignature, The signers will have to sign and click on continue
- Once the signer will click next they will be redirected to the payment page.
- Once the signer will complete the payment then the document will be signed and completed.
- After completing the document the agent will be able to see the details of the payment in the timeline.
