Now, within the NPS module, we’ve implemented several minor improvements to enhance your user experience and functionality according to your needs.
Use Case: Enhancements in the NPS module will improve customization, simplify survey distribution, and enhance feedback collection for a simplified user experience.
To View the Enhancement:
Earlier, the email feature was only applied to agents and managers. We have now removed that restriction, so it applies to all contacts, regardless of whether they are using the same email address or coming from support emails.
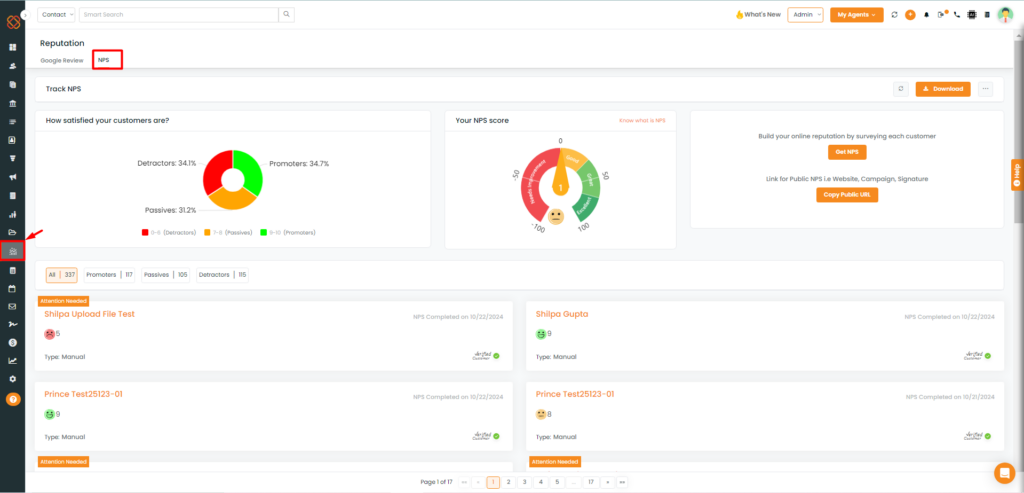
- Navigate to the ‘Reputation’ section from the sidebar module.
- Then, select NPS from the top left corner to open the NPS dashboard.
- Select ‘Get NPS.’
Recent Enhancements Overview-
Enhancement 1:
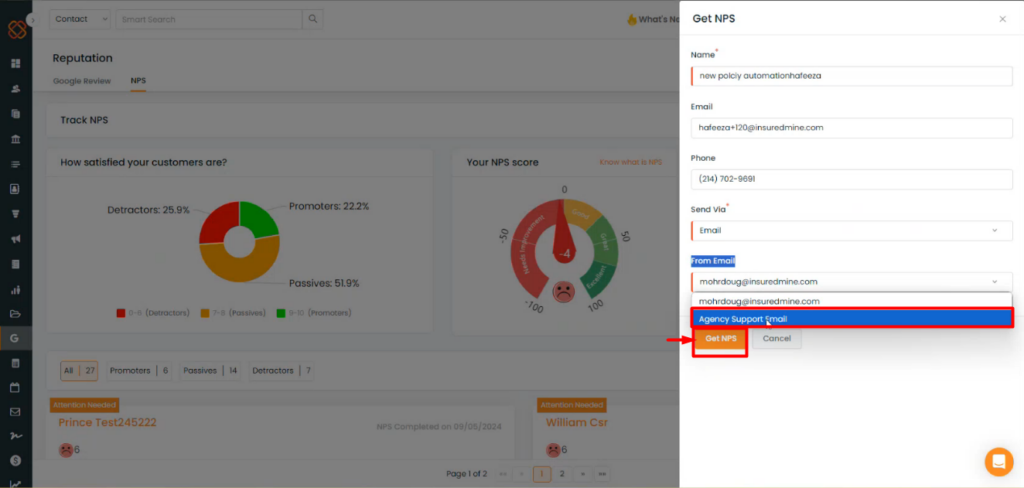
- Fill in the details such as Name, Email, Phone, Send Via, and From Email to send the NPS survey link.
- The NPS survey link will be shared via the Agency Support Email.
- Then, click on Get NPS.
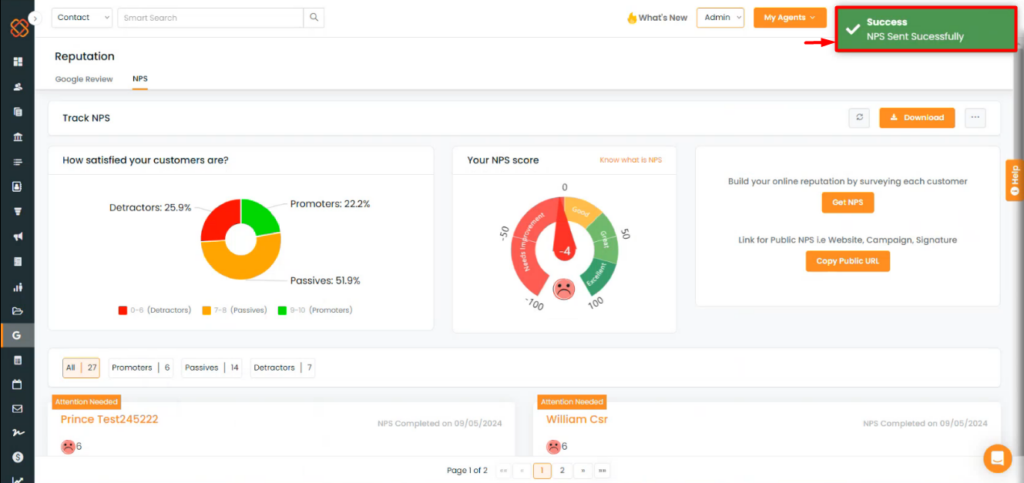
- You will then receive a notification pop-up saying: “Success NPS Sent Successfully.”
Enhancement 2:
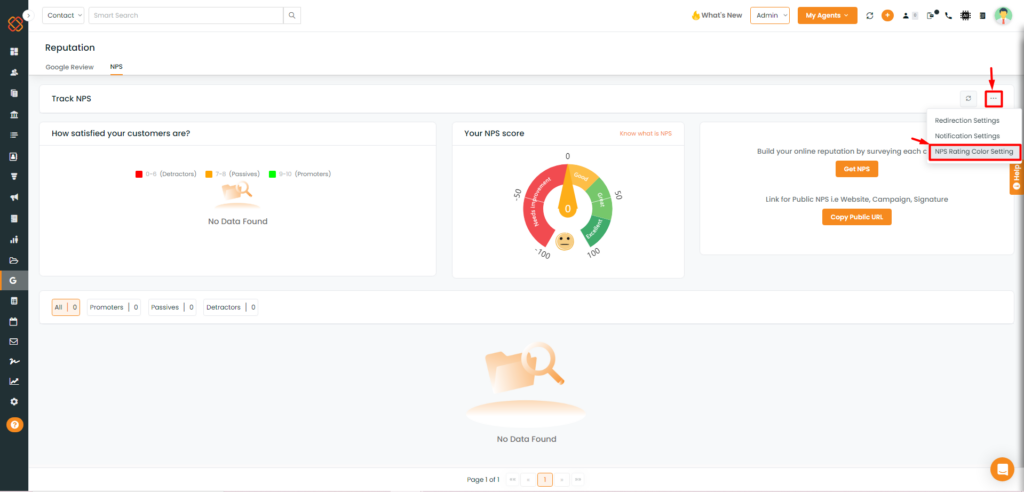
- Click on the three dots present in the right side corner.
- Then, from the drop-down click on the NPS Rating Color Setting.
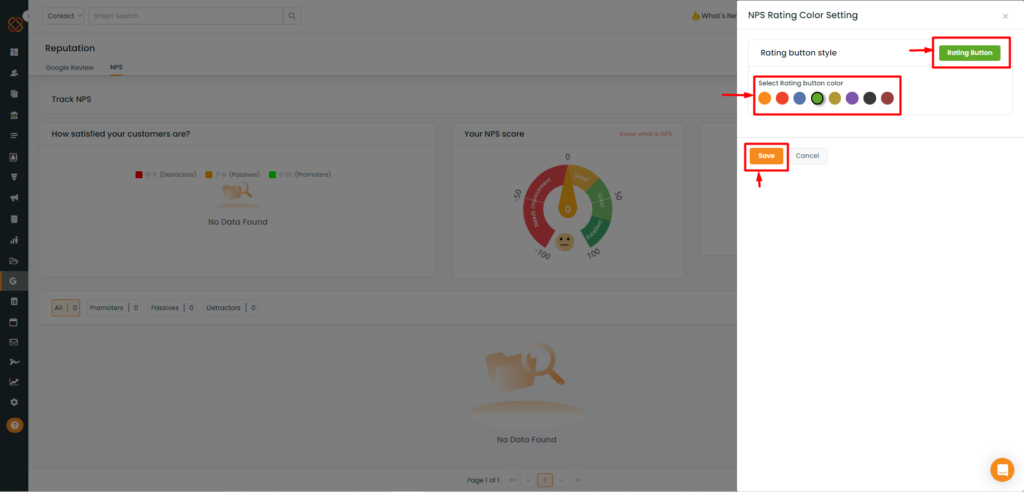
- You can customize the style of the rating button and choose any color you prefer. Additionally, the color of the survey link will be updated accordingly.
- Click Save.
Enhancement 3:
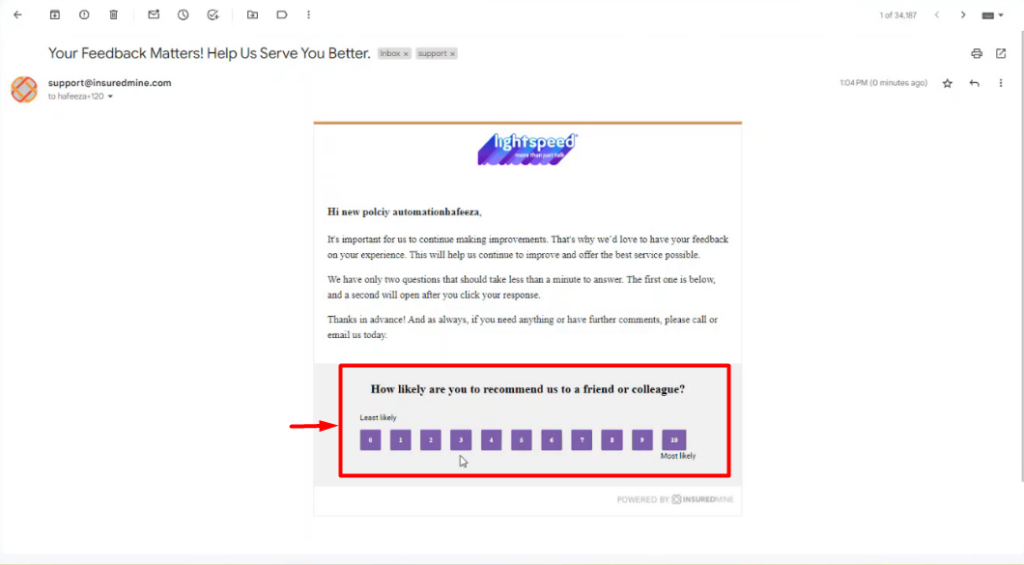
- Small Paragraph has been added above the bolded question below the logo.
- Title of NPS Survey link email has been changed to “Your Feedback Matters! Helps Us serve you better.
Enhancement: 4
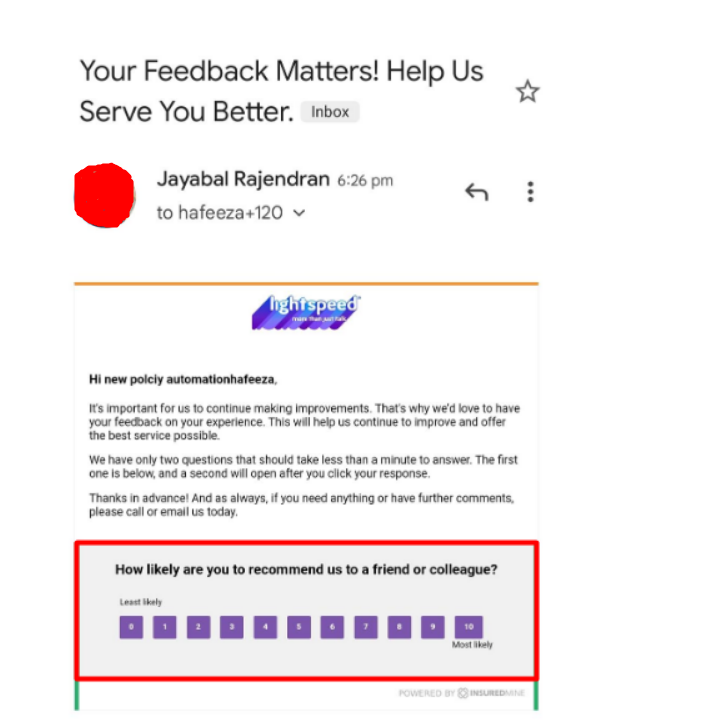
The mobile version of the email of the NPS Survey link has been consolidated into one line.
Changed opening sentence to “Thanks for your feedback! How can we improve your experience”?
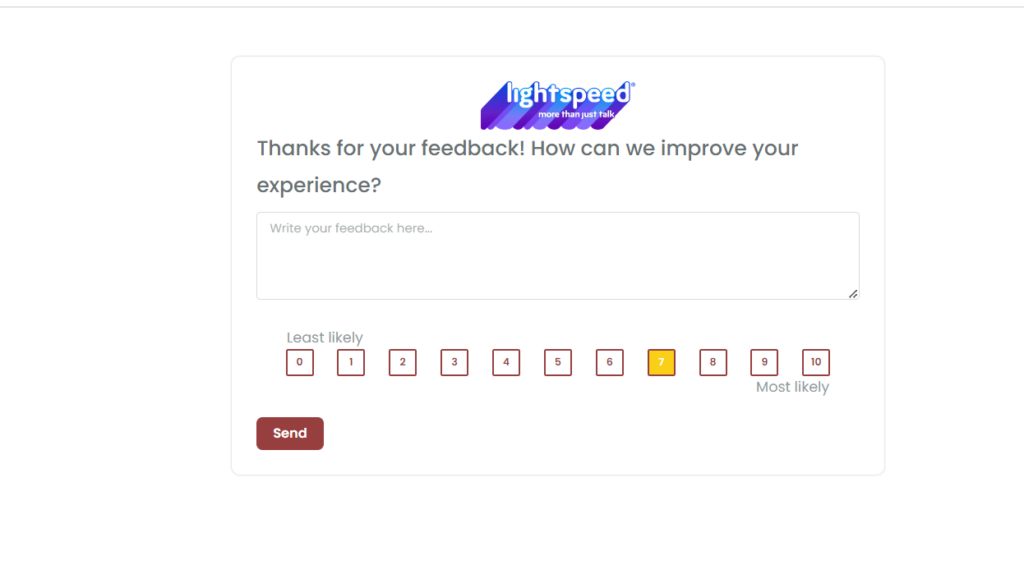
Enhancement 5:
Changed the Title to “Thanks for your Feedback.”
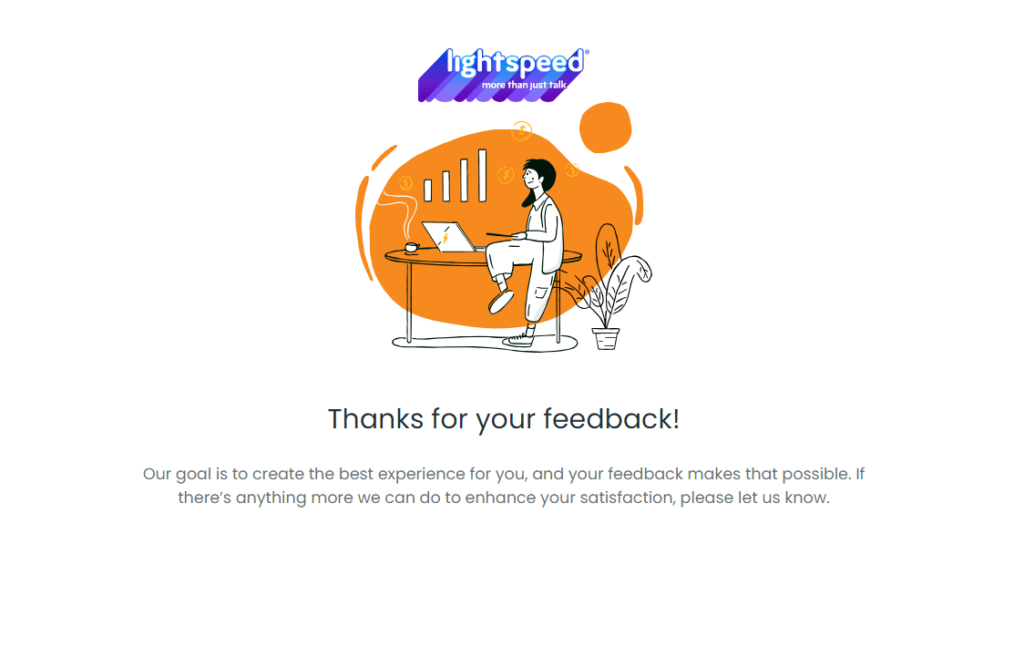
Enhancement 6:
- Subject Line changed to “Your Feedback Matters.”
- Small Paragraph added above the bolded question below the logo.
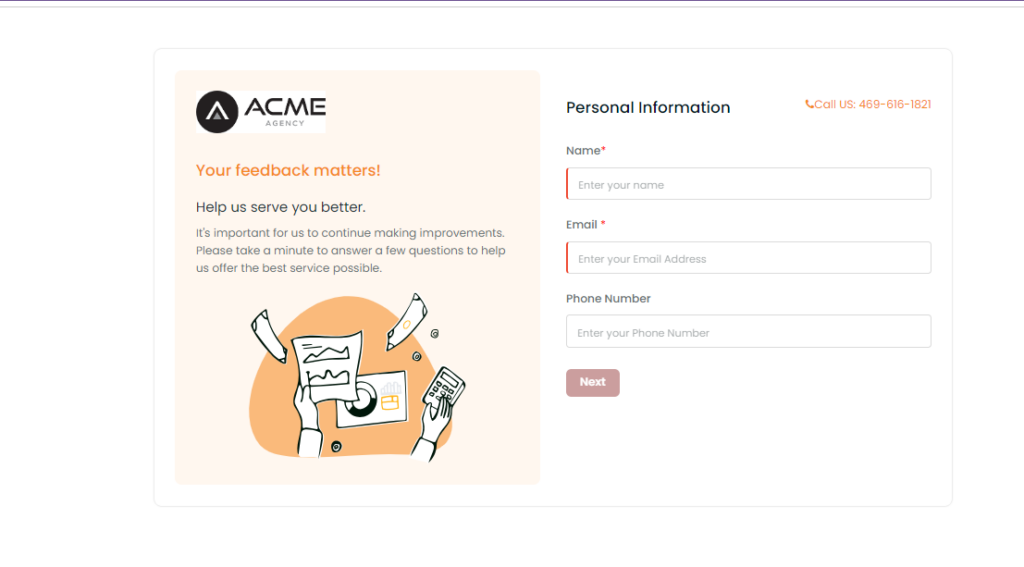
Enhancement 7:
Thank you message changed based on the score given by the customer.

Enhancement 8:
Branch Logo Setup and Use as a Tag
Now you will be able to setup branch logo and use it as a tag anywhere from the tag section within InsuredMine.
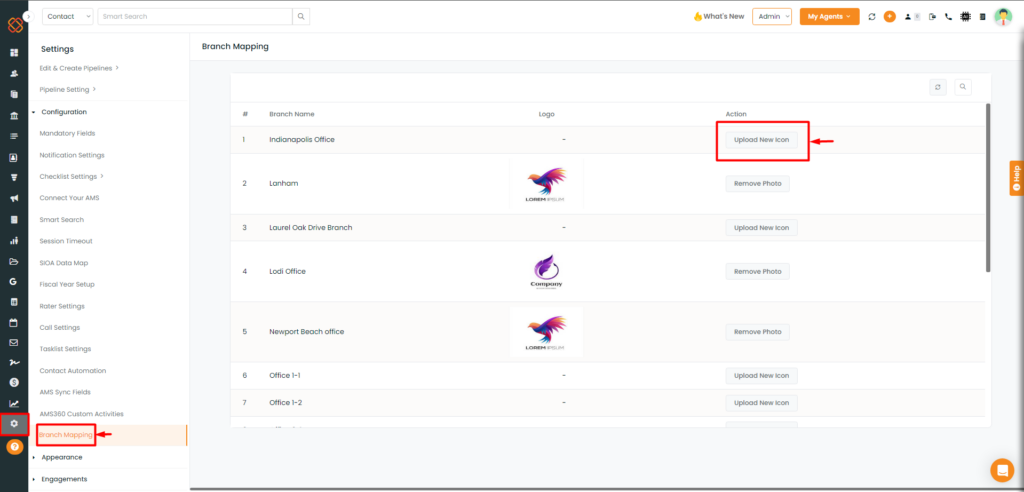
- Navigate to the settings module.
- Then, within configurations select ‘Branch Mapping.’
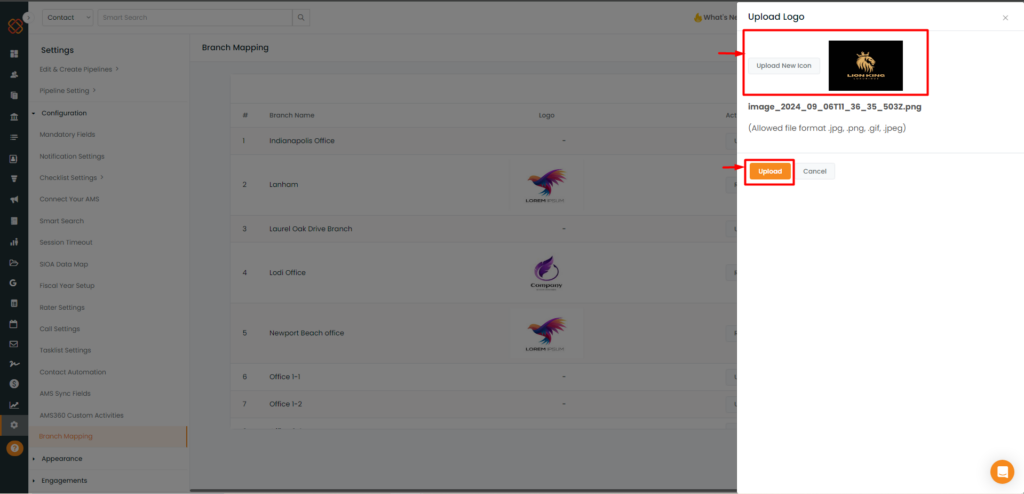
- A side panel will open where you need to upload logo.
- Select the logo and then hit upload.
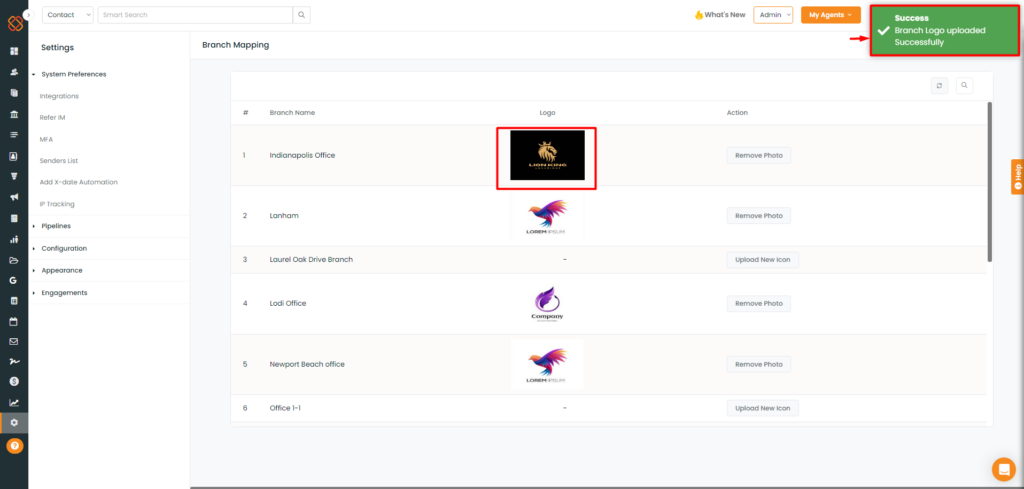
- You will then get a success notification saying: Branch Logo uploaded Successfully.
To use it as a Tag:
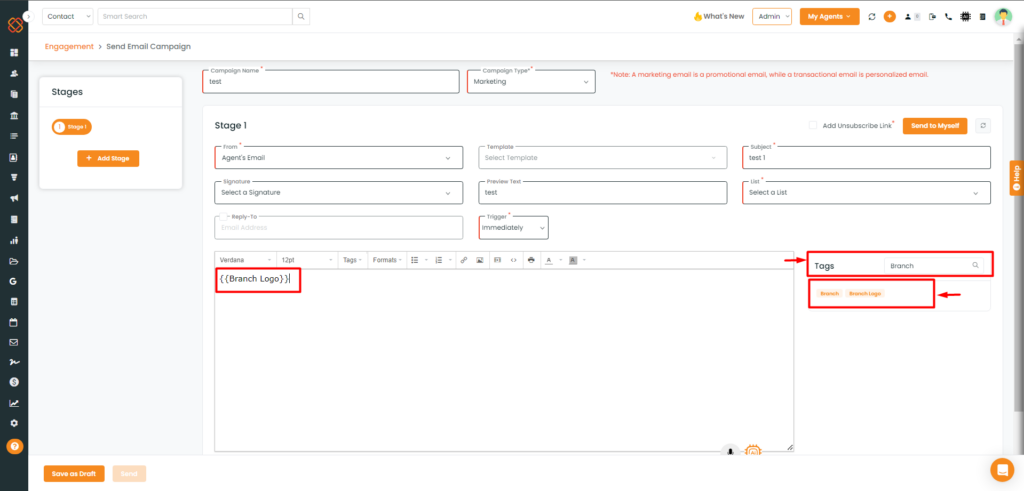
- You can use the Branch Logo tag from anywhere within InsuredMine you attach tags. For instance I have attached tags within the send Email Campaign.
While sending an NPS survey for a specific branch, the branch logo will be displayed instead of the agency logo in the survey link as mentioned in the image below:


