With the latest update, we have introduced the convenient feature of mapping policies directly to files. This efficient process can now be seamlessly executed through both the Account 360 and Contact 360 pages of the account & contact, significantly enhancing the agent’s workflow.
Areas from where you can map policy to file easily:
From contact 360:
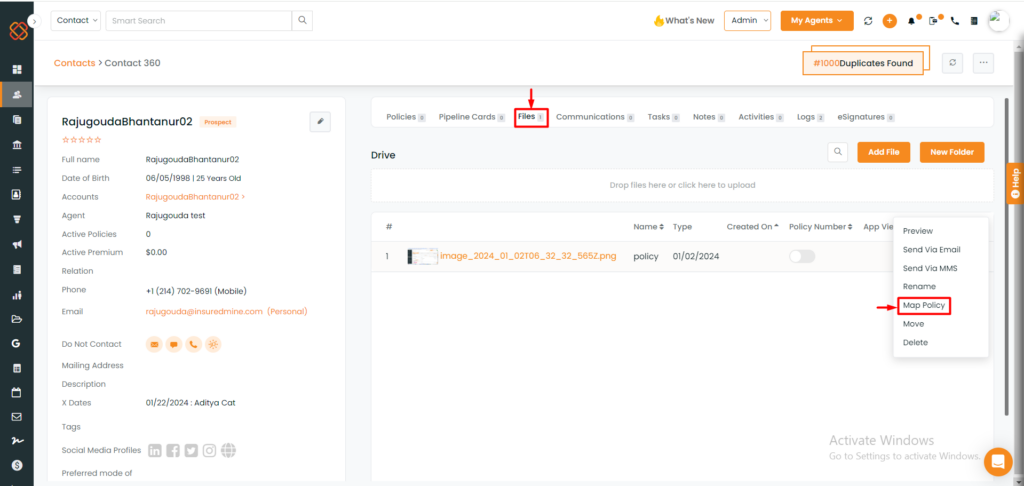
- Navigate to Contact 360 page of the contact & check if you have any policies added.
- Then, click on the “Files” section.
- Identify the specific file you want to map the policy to.
- Click on the three dots icon next to the file.
- Choose ‘Map policy’ from the drop-down menu.
From Account 360:
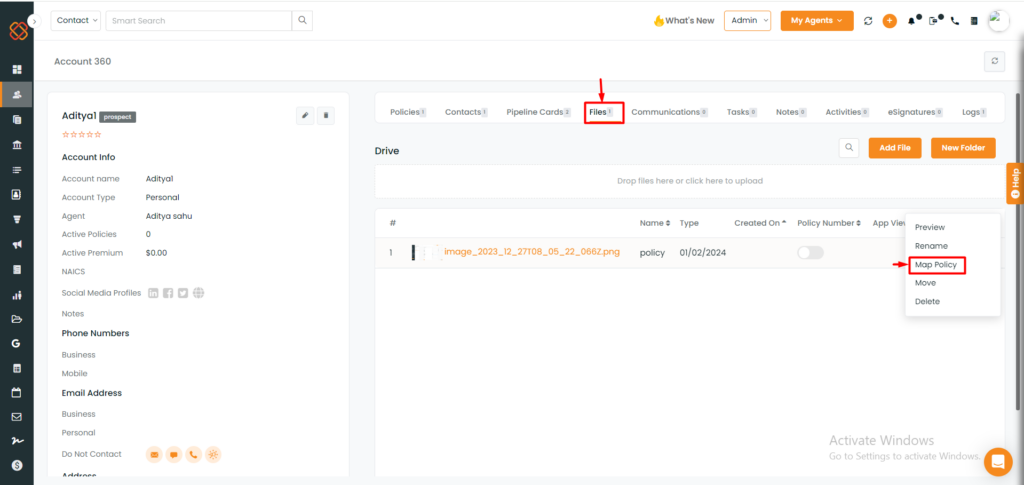
- Navigate to Account 360 page of the account & check if you have any policies added.
- Then, Click on the “Files” section.
- Identify the specific file you want to map the policy to.
- Click on the three dots next to the file.
- Choose ‘Map policy’ from the drop-down menu.
Whether you are accessing the Map policy to file option from the Contact 360 page or the Account 360 page, the next steps remain the same for both.
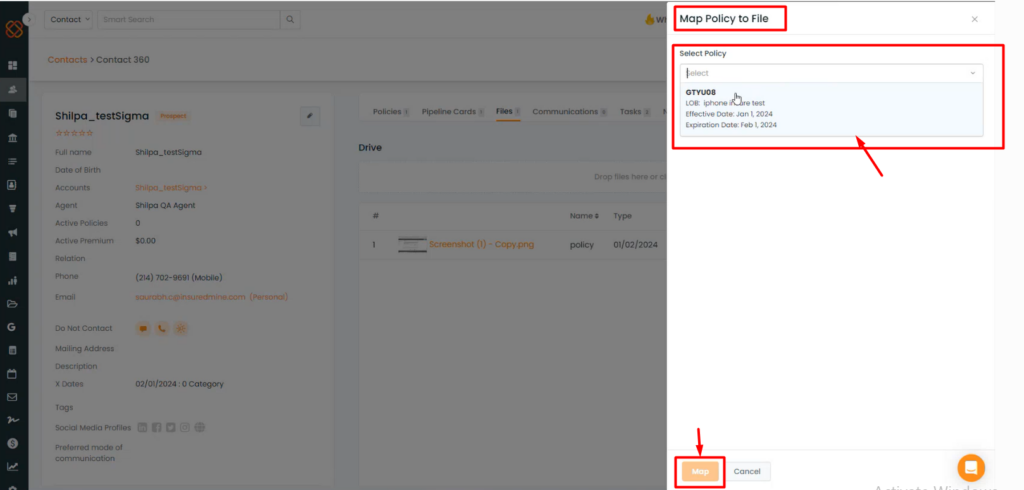
- A minimized window will appear on the right, asking you to select the policy.
- Click on the map option.
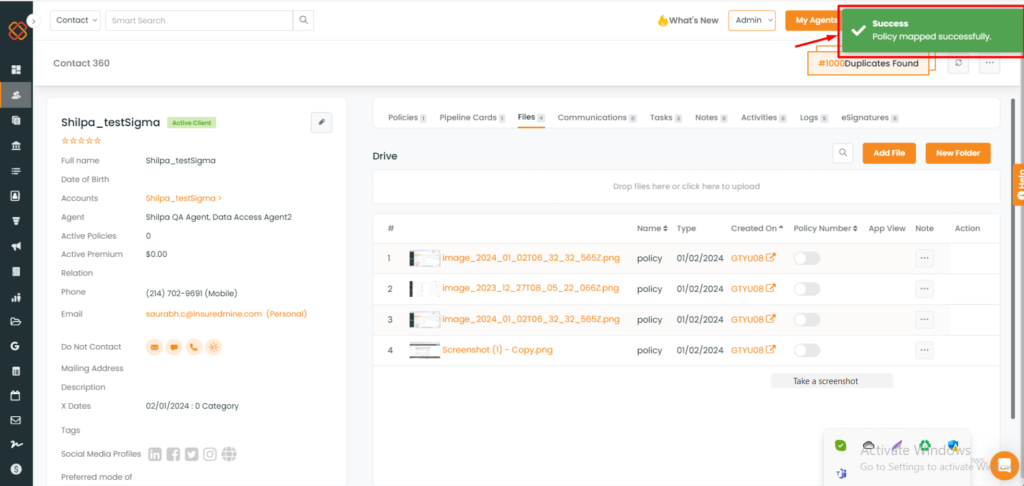
- You will get a success message saying: Policy mapped successfully!
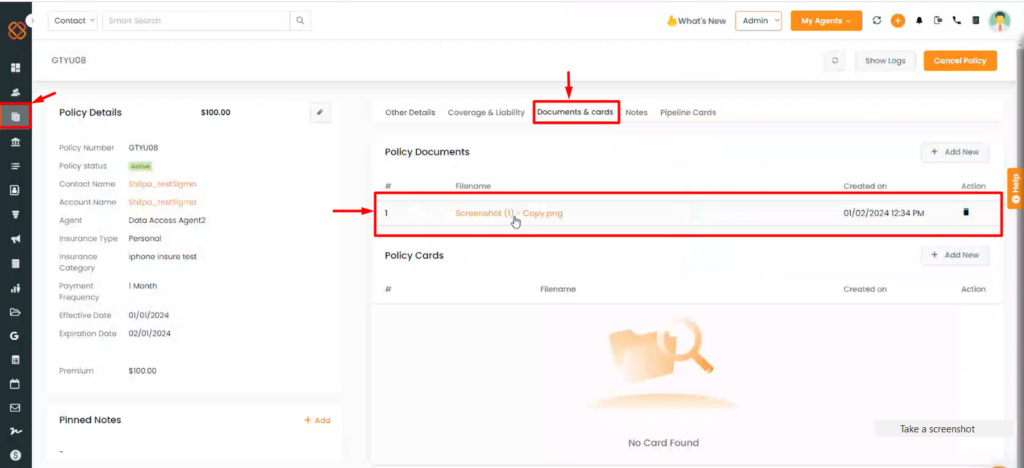
- To view the mapped file, head over to the policies module and click on the documents & cards section.
Note: This mapping process can only be performed once. Once completed, you won’t be able to retry it for the same file.


