In this article, you will learn:
With this upload feature, you can bulk create/update new or existing user profiles in InsuredMine by uploading a CSV file with a list of user profiles.
- Login to your InsuredMine account, and then click on the Contacts tab and click on the Upload data button.
2. Drag and drop your .csv file in the target field or simply browse through your computer for the file by clicking on the browse button. Click on the Next Step button once you’ve added your file.
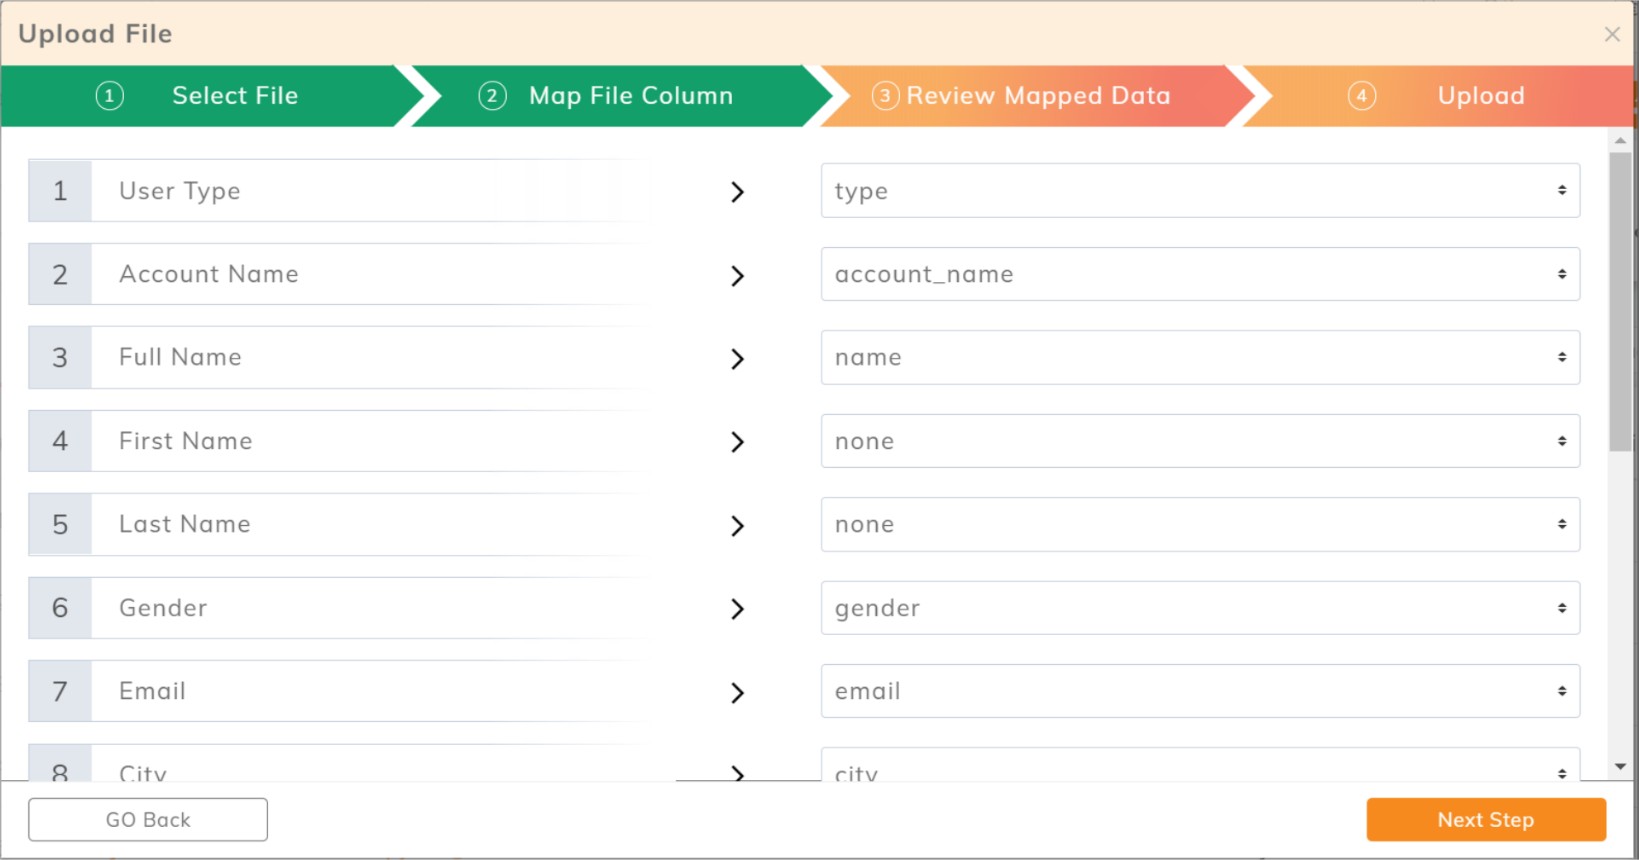
3. Once processed, you will have headers identified from your file that would need to be mapped to the header in the Contacts table.

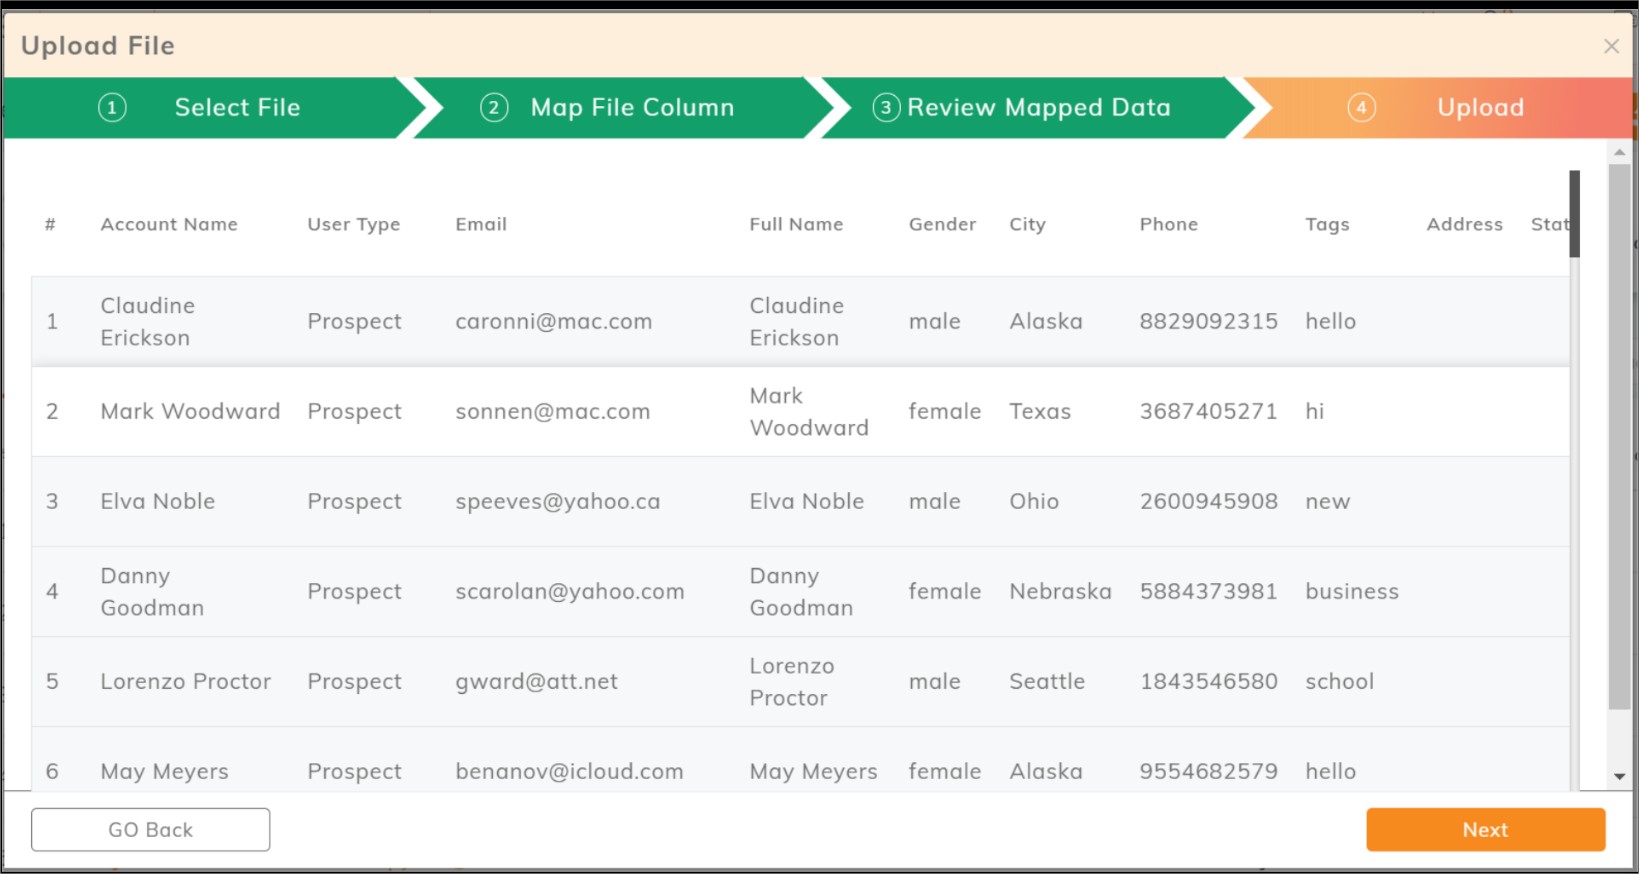
4. Click on the Next Step button to review your data before you finally upload it.

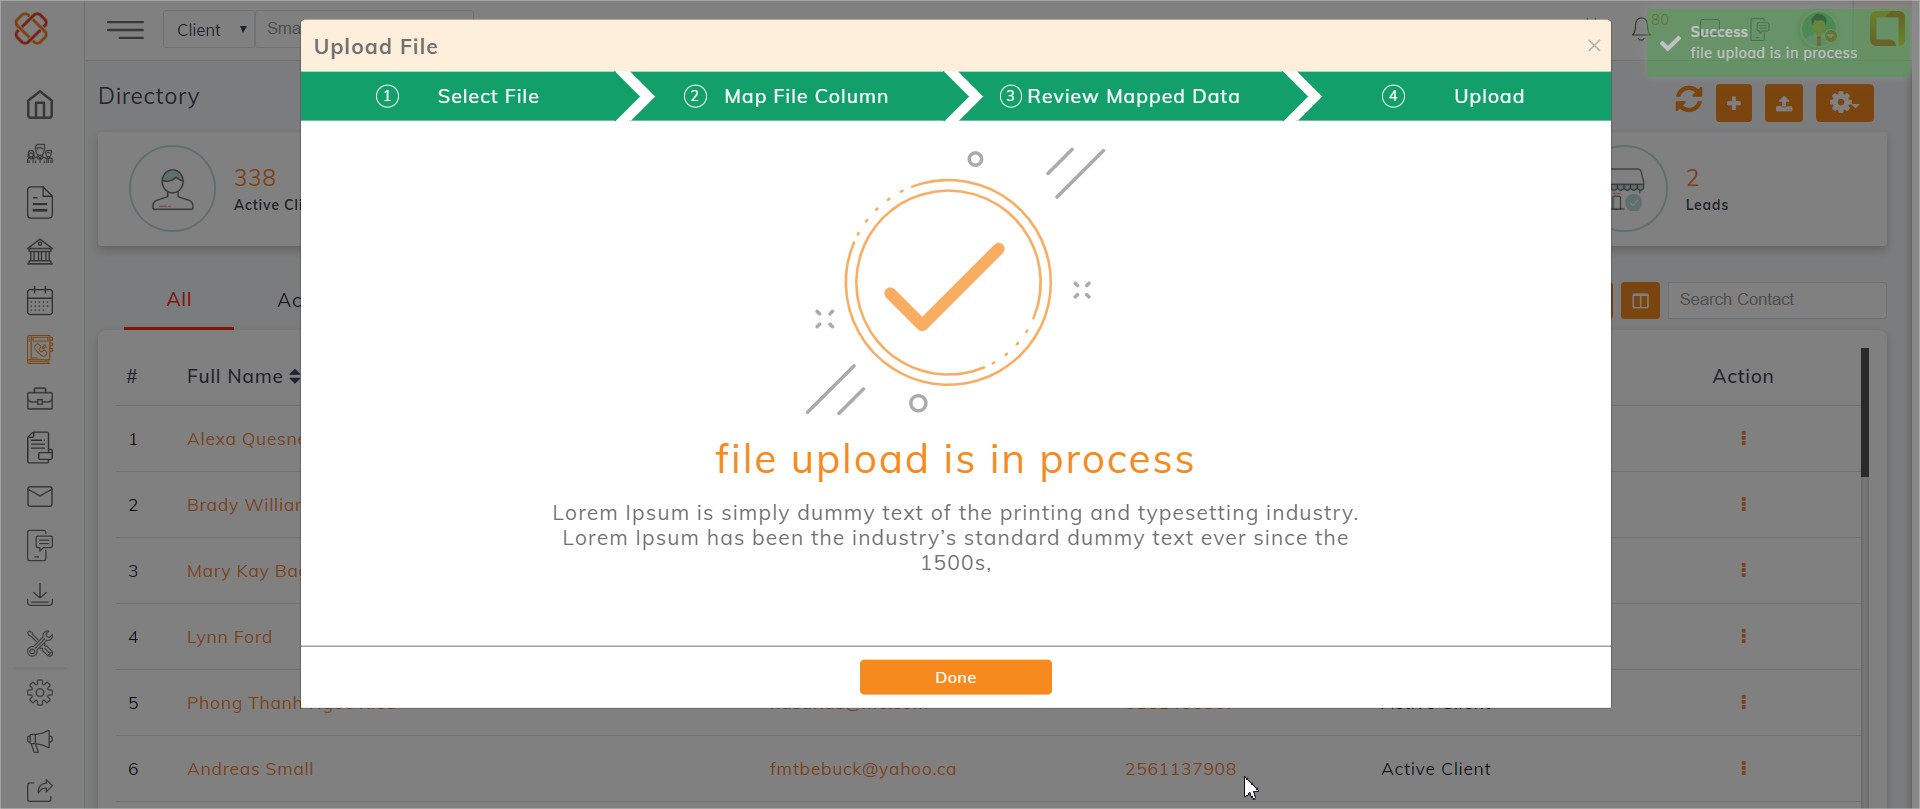
5. Once you click on next, the upload will start automatically.

Notes
- If a new user profile is uploaded, a new user profile is created on the account.
- If an existing user profile is uploaded, the old user profile is updated with new values.
- You can upload multiple CSV files at a time, even while existing files are currently processing.
- Once the upload is completed, the information will be updated in the profile.
TIPS: CSV File Format
- CSV stands for comma-separated values. It is a simple file format used to store tabular data, such as a spreadsheet or database. Files in the CSV format can be imported to and exported from programs that store data in tables, such as Microsoft Excel or OpenOffice Calc.
- If the file is not a CSV or the file does not comply with CSV standards, the upload will not be allowed.
- You can upload a CSV with a file size of up to 5.00 MB.
Enhancement: June 2021
Custom fields in CSV Upload for Contacts
You can now upload CSV files with user-defined or customized fields. Admins add fields for specific data entries in the contact details. Those fields were added manually earlier, now they can be automatically mapped and displayed in your Insuredmine contacts.
To upload custom fields in contacts with a CSV follow the steps mentioned below:
- Navigate to Contacts and click the Upload data icon on the top right.
- Upload the CSV contacts file from your system in the Select File tab. Click Next.
- Select the CSV columns to be mapped into insuredmine contacts and click Next.
- Make sure all your required fields are mapped properly, in the Review Mapped Data tab. Click Go back to make changes or click Next to proceed.
- Click Done to Upload file. A sample screen image for upload notification is shared below.
Enhancement: January 2021
Custom data upload in CSV upload
Admins can add fields for specific data entries, called custom fields. Those fields were added manually earlier by adding or editing contacts, now they can be added while bulk upload itself.
Agents can upload CSV files with custom fields that are already provided by the admin. Before uploading the CSV file, the agent needs to check the pre-set custom fields. The contact details will be automatically mapped and displayed in your Insuredmine contact section.
Enhancement: February 2021
Uploading Contact using Excel
Now you can upload data in the contact section, by using excel file too. Previously it was only CSV files that you could upload but now you can do in any form- either csv or excel.
To view the enhancement:
- Navigate to Contacts
- Click on Upload Data icon
- You will get the option to upload files either in CSV or Excel format.
- Upload the Excel file that contains the contact details.

- Click on Next Step to map the file columns

- Review the mapped data and upload
- Once the file gets uploaded, click on Done


