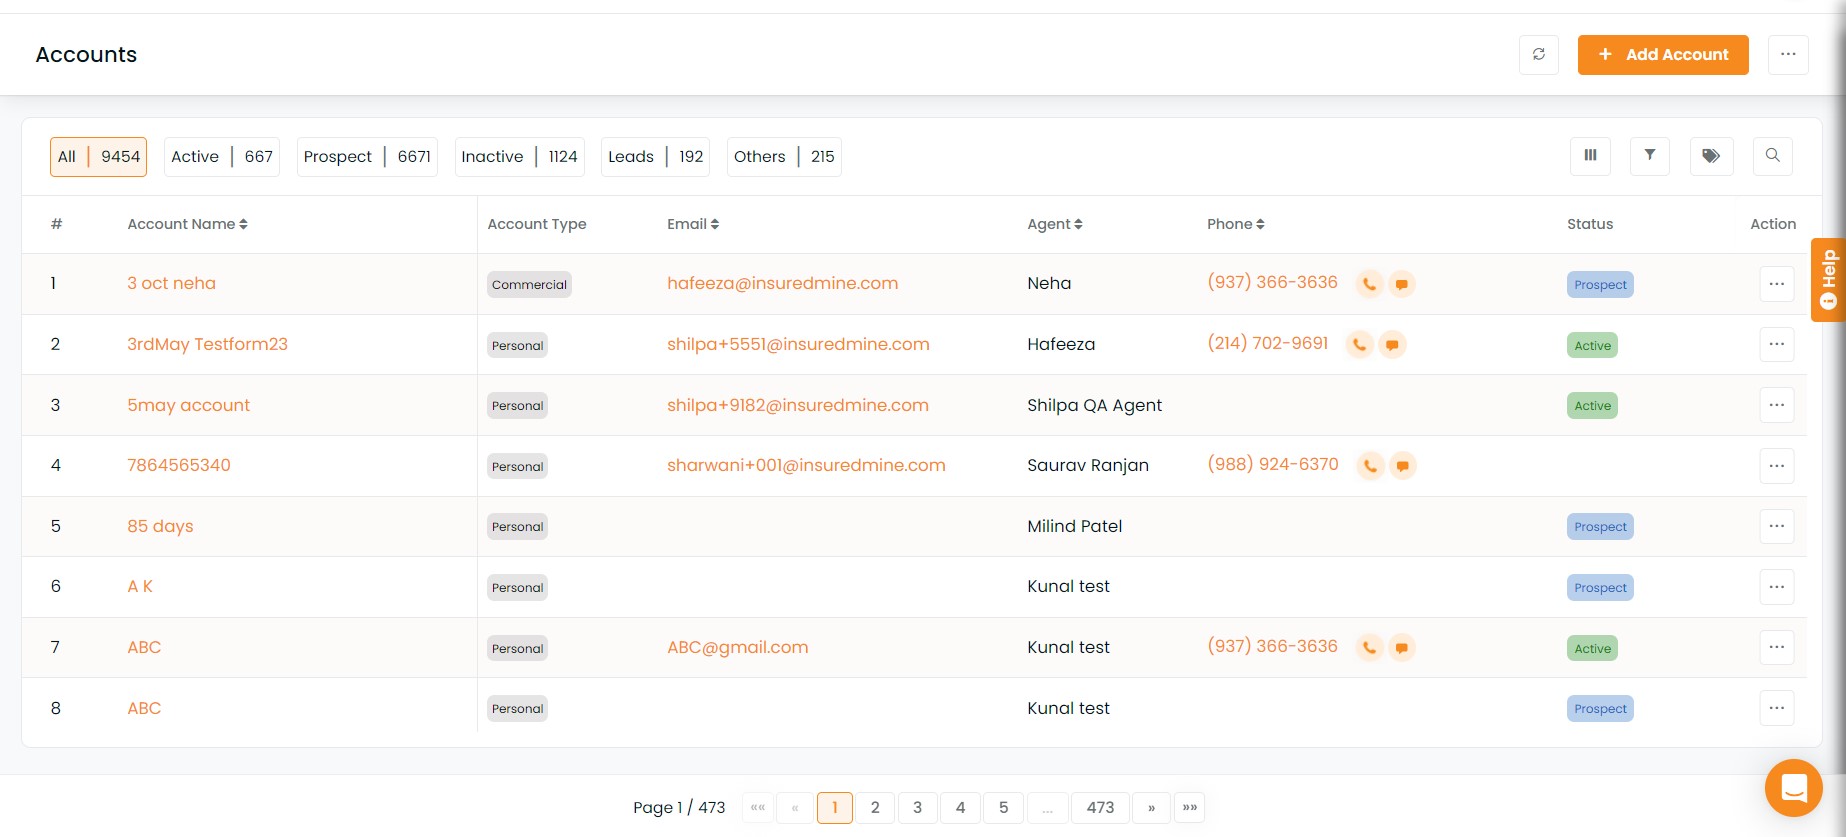
Accounts section will help you to get an overview of all the accounts you have in your bucket.
Now all the accounts will be displayed on the accounts page, irrespective of any active policy or deal card in it.
How to view all accounts?
- Navigate to Accounts

The accounts list will include account name, primary contact, total premium, number of policies related to the account and agent’s name.
If you want to have a contact 360 view of the primary contact click on the name. You can also edit it as needed.
If you want to have an account 360 view click on the account name. You can also edit it as needed.
How to customize the table view of the accounts page?
- Click on Select Table Column
- A window will open with all the fields
- You need to choose the data that you want to have in table column view. You can enable and disable the fields of your choice.
- Click on save
You can also send email and text messages directly by click on the icons provided in the accounts table.


Enhancement: May 2021
Account Status KPI Display
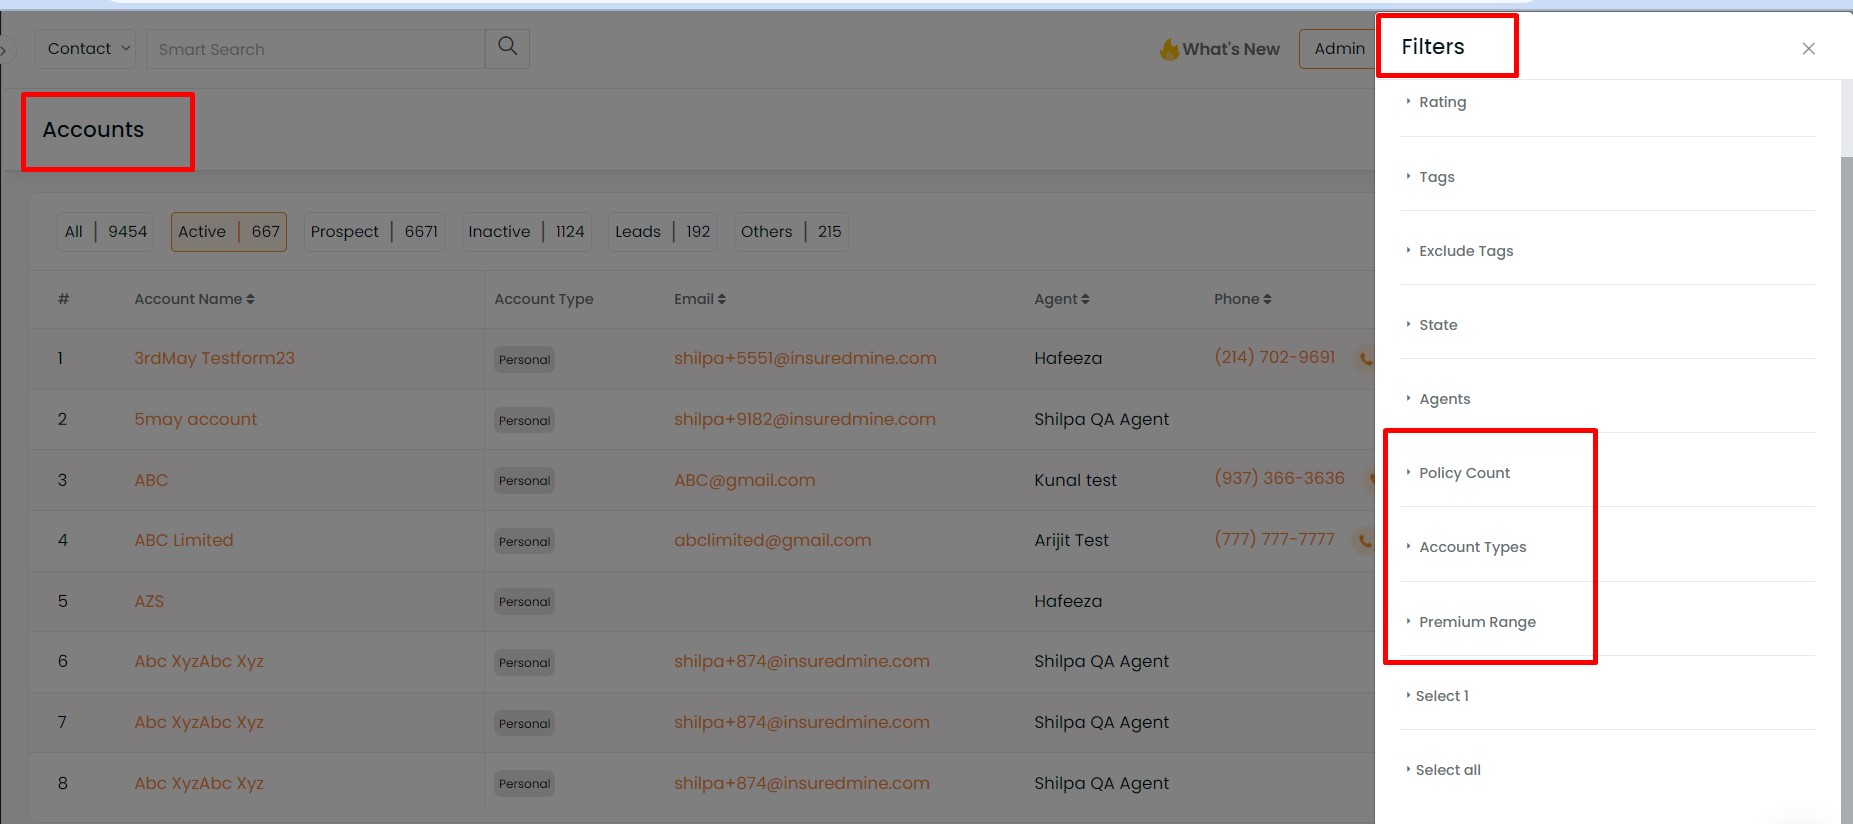
Account status KPIs are now visible on the top as you open the account page. In the Account section, you can select the accounts based on their account status- active client, inactive client, lead, prospect, other, all.
By default, the active clients will be displayed in the list.

New filters in Accounts filters- policy count, premium range and account type
In Accounts module 3 new filters have been added including Count, Account Type and Premium Range Filter.

Count- The user can filter the accounts based on the number of policies. The options that they can choose from are: 1,2,3,4,5,5+
Account Type- The user can filter the accounts based on the account type that they have already created before.
Premium Range Filter- The user can select the accounts based on the premium range. The range that they can choose from are: $0-$1000, $1000-$2000, $2000 – $3000, $3000 – $5000, $5000-$10000, $10000+
Along with these 3 new filters other filters that are available are: Status, X-Date, Tags and Agent


