In this article, you will learn:
CSV upload – You can upload an entire new list of contacts that can be saved and used as a list to start a new campaign.
To upload a file follow the steps below:
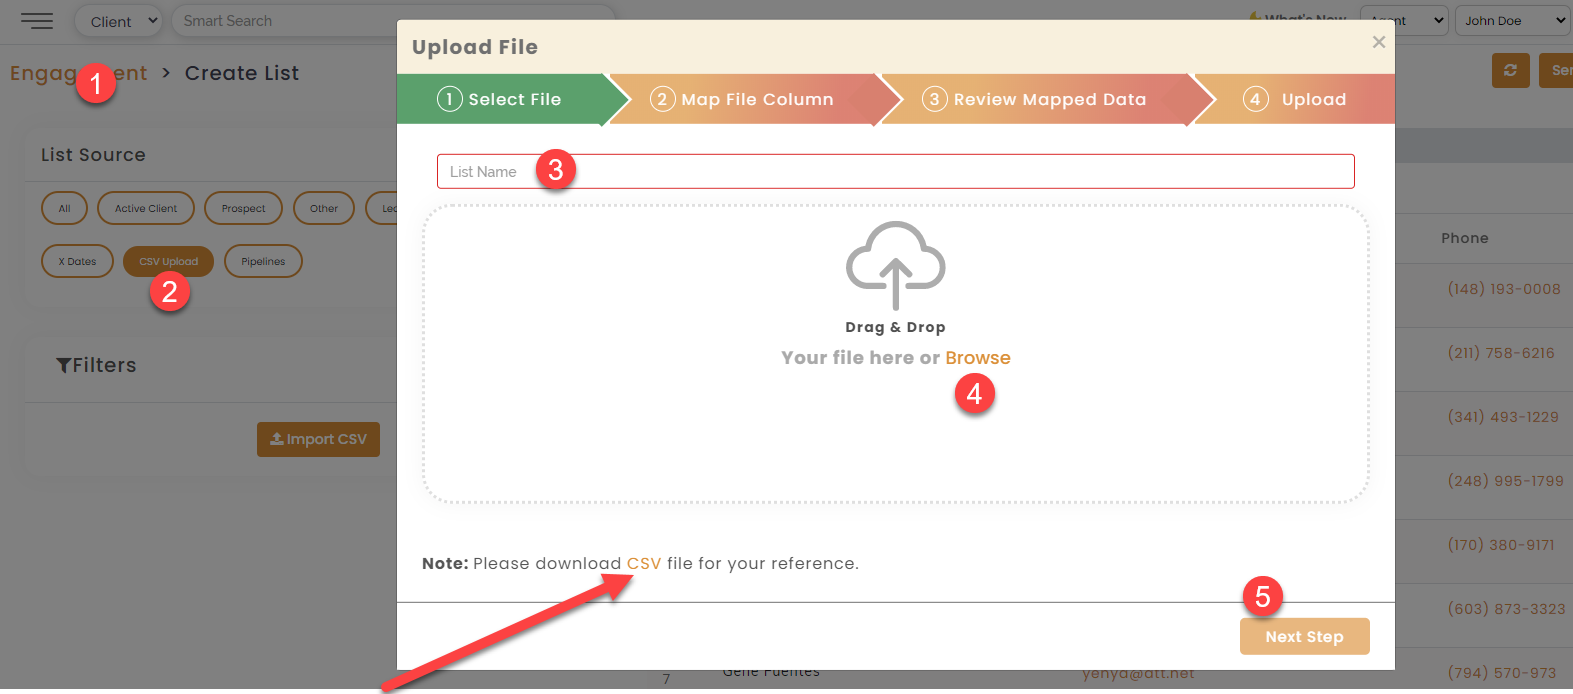
- Go to Engagement Module >> List Section
- Click on CSV upload
- Name the Upload (This file name will be available in List Library for reference)
- Click on Browse option to access your local computer to upload the CSV file.
- In case you are not sure of the file format or specific header, there is a sample CSV file uploaded for your reference at the bottom right. (marked with arrow)
- Click on Next steps to proceed.


Match each column of the CSV upload to the InsuredMine Fields. You may not have uploaded file for all the column, in that case just match those that you have uploaded. Which could be as minimum as Name and email.
Enhancement: June 2020
First Name Last Name in CSV list
In your CSV list, the first name and last name may appear together in one column, but while uploading it to Insuredmine they will show as separate entities. For example , your CSV List has a contact name John Doe with no separate entries for the first and last name. The uploaded list will display First name as John and Last name as Doe, in the Contacts Module of Insuredmine.
This list also includes address to be able to use the mail automation to send handwritten postcards.
| Before Upload | After Upload |
| Full Name = John Doe | Full Name = John Doe |
| First name = (blank) | First name = John |
| Last name = (blank) | Last name = Doe |


