Home » Knowledge Base » Microsoft (Email, Calendar & Scheduler Integration) Migration
Integrations
Microsoft (Email, Calendar & Scheduler Integration) Migration
February 20, 2025
Release Date: February 19, 2025
Note 💡: When the admin sets it up for the first time for their agency, a pop-up will appear requesting approval. Add a reason, then click ‘Request Approval.’ Next, the request will be sent to the Microsoft admin who must verify InsuredMine to enable user connections within the agency. Once approved, all agents can connect seamlessly, which is a one-time process.
What’s Changing?
With the latest enhancement, we are now migrating to a new API version to ensure your email and calendar services continue without disruption. This migration is simple and will not affect your existing functionality. To complete the transition, you only need to disconnect and then reconnect your account to authenticate with the new API version.
Steps to Complete Migration:
Note: Once the V3 migration is complete, re-authenticate your account to continue using Microsoft email, calendar and scheduler services within InsuredMine.
How do I do a successful reconnection?
Follow these steps:
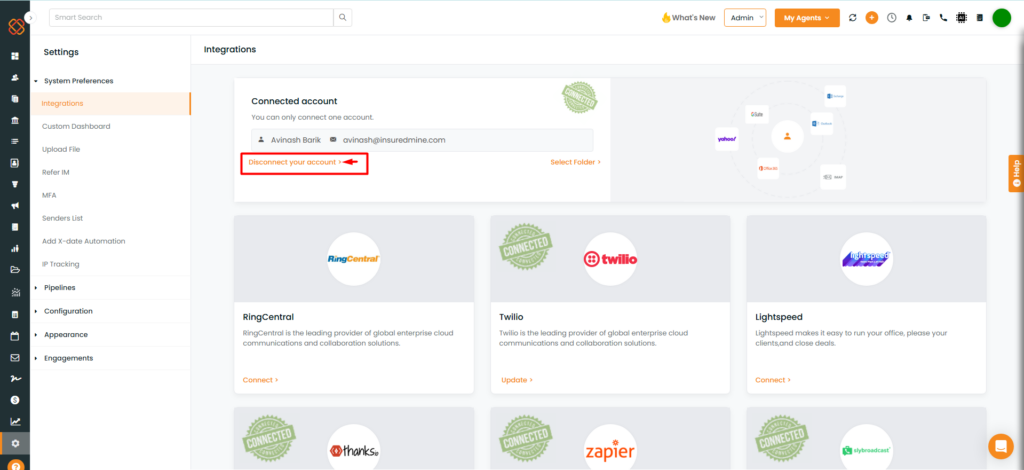
Step 1: Disconnect your existing email account from InsuredMine.
Navigate to Settings> Integrations> Disconnect your Account.
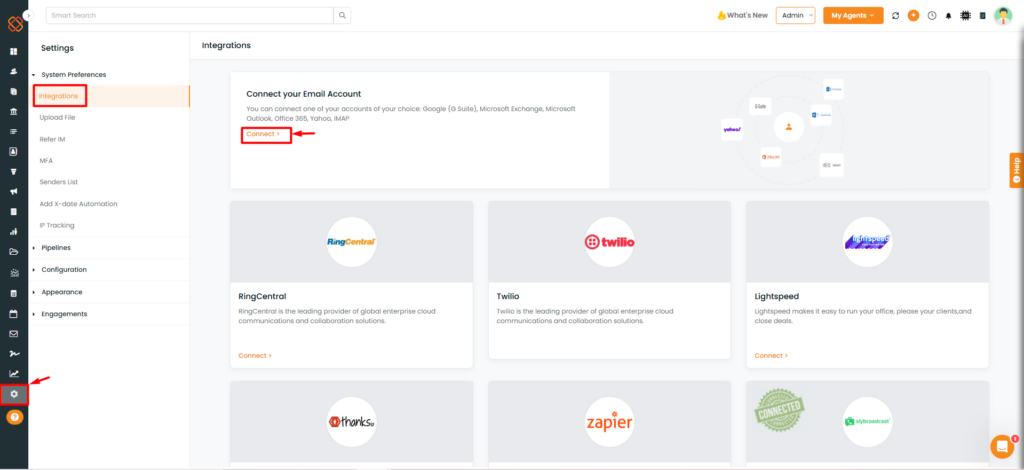
Step 2: Connect Again
Navigate to the Settings > Integrations > Connect Your Email Account.
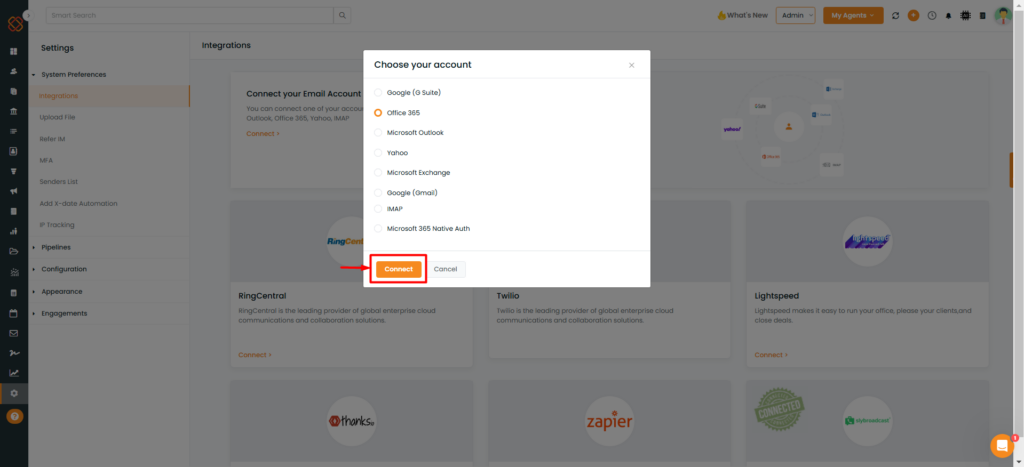
Select your Email Provider.
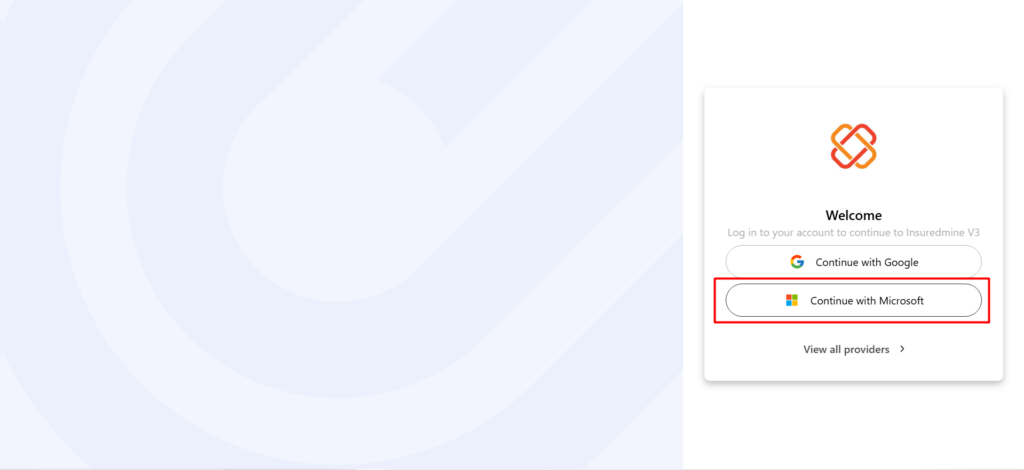
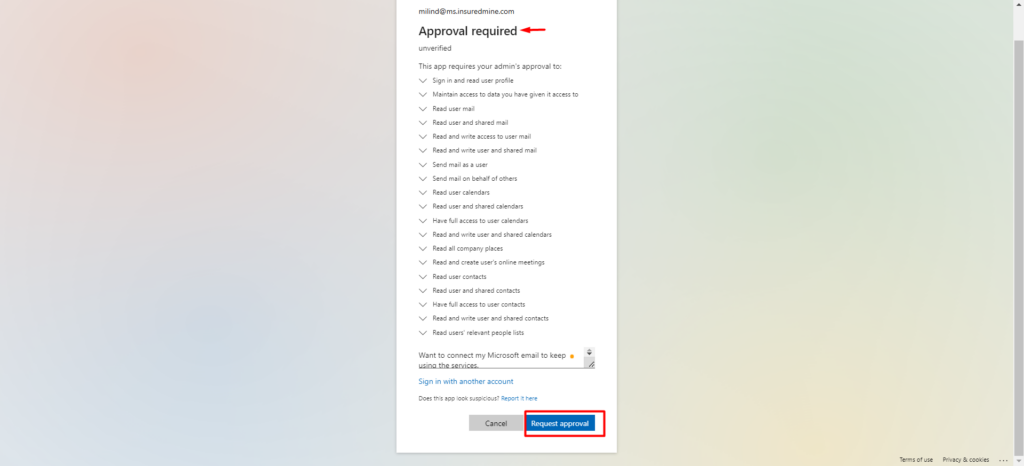
You will be redirected to the Nylas page, where you must re-authenticate your account with your email service provider.
Next, add the reason and click on ‘Request Approval.’
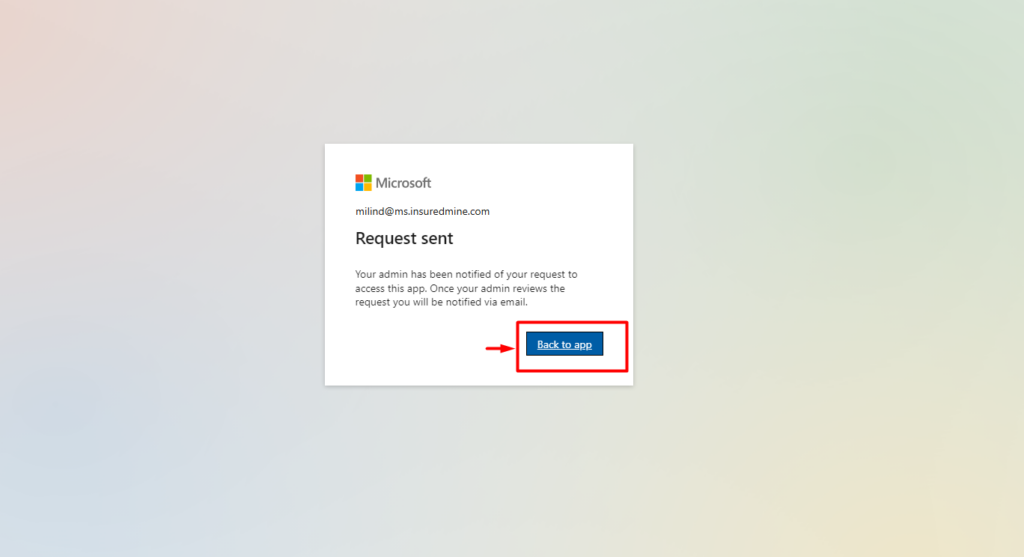
Once you request approval, it will be sent to the Microsoft admin for verification.
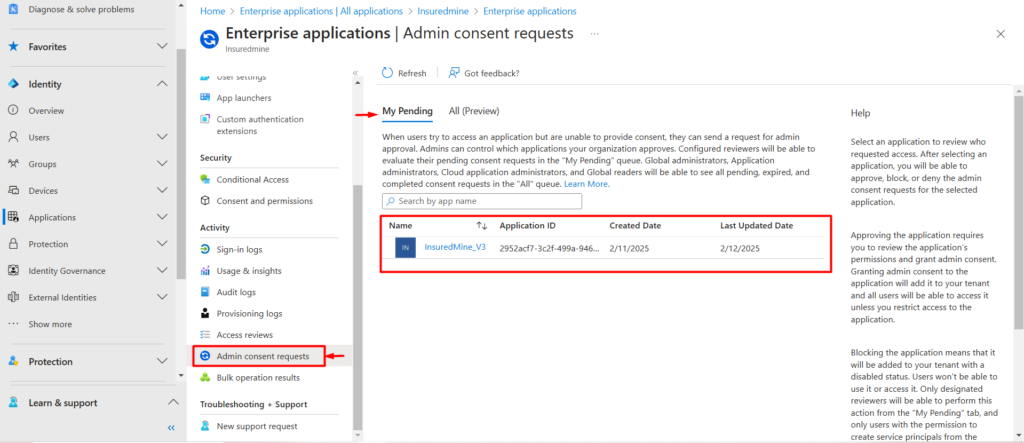
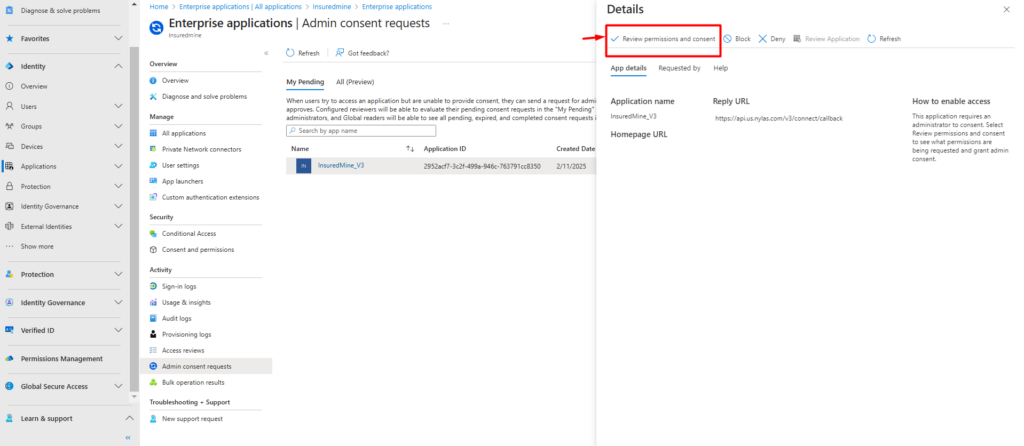
Check for Pending Requests if you found any pending request related to app name “InsuredMine_V3 then “Review permission and consent”
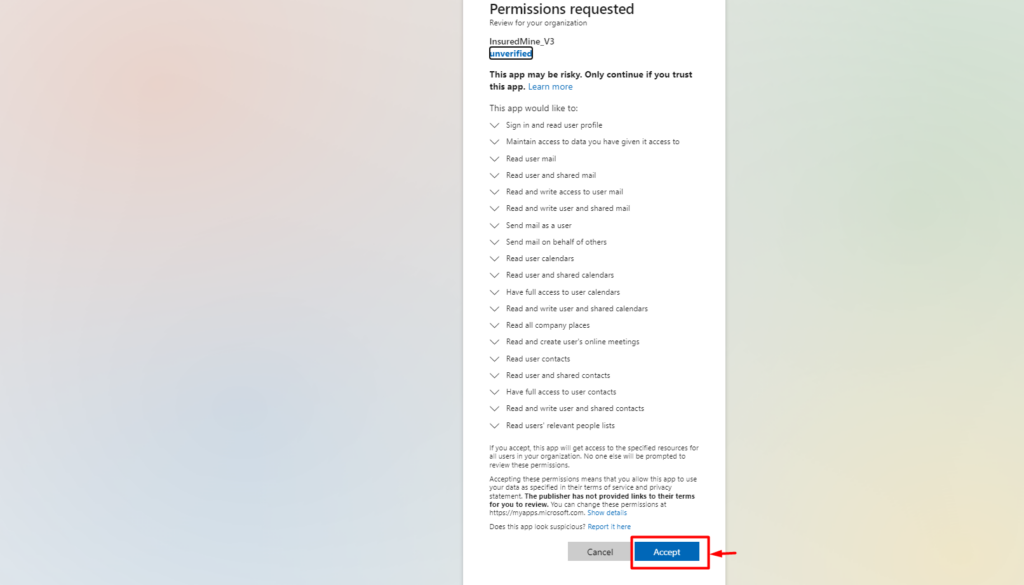
A pop-up will appear, prompting the admin to ‘accept’ the request and grant permission for InsuredMine.
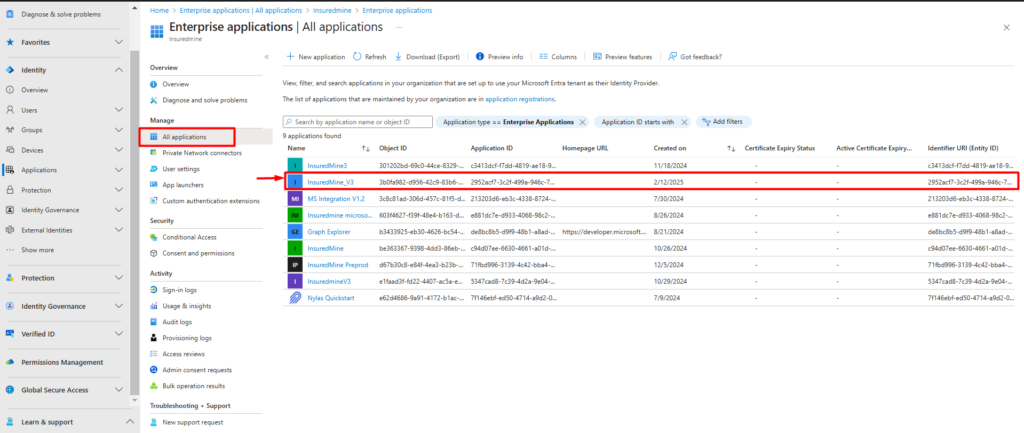
Once the verification is complete,
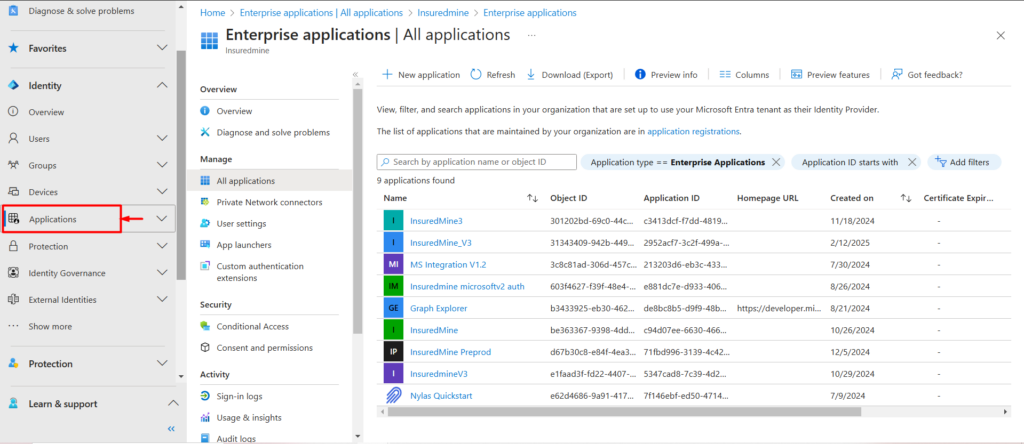
Navigate to All Applications and check if the app is listed. If it is, instruct the user to retry the authentication process in InsuredMine.
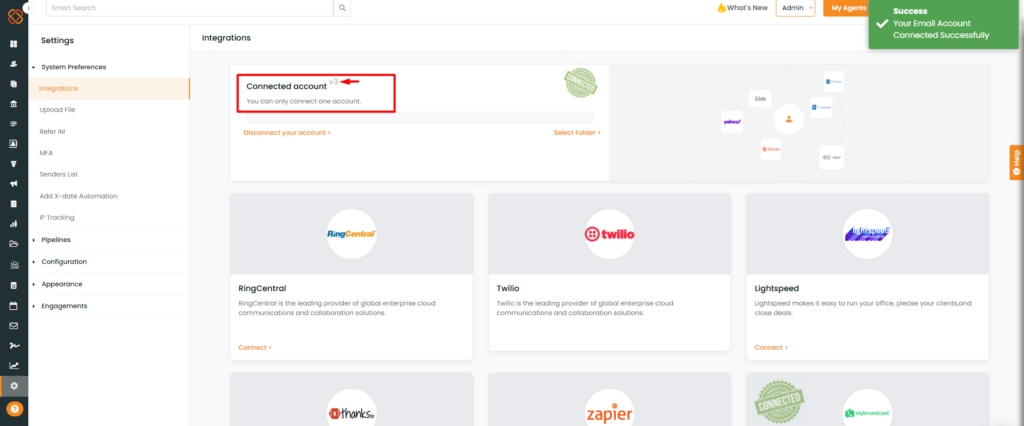
Once connected, your email integration page will display a V3 icon, as shown in the image above.
How to Confirm a Successful Reconnection?
Once the process is complete, a ‘v3’ icon will appear on your Email integration page.
What Happens If I Don’t Reconnect My Email?
It’s important to disconnect and then reconnect your email to continue using your email, calendar and scheduler services.
Does the Whole Team Need to Do This?
Yes, everyone who actively uses their email, calendar, and/or scheduler must reconnect their accounts.
How to Use Scheduler Services with this current Migration update?
Note 💡: If you already have scheduler links and used them in the emails, signatures, campaigns, etc, please copy the new link and update it wherever you’re using the old scheduler link or have added the old scheduler URL, you’ll need to replace it with the new link and update in all the places where the old link was shared or embedded.
However, if you’re using scheduler tags in templates, signatures, campaigns, pipeline automation, or SCD, no changes are necessary within InsuredMine. The updated scheduler tags will be automatically retrieved and will continue to function as expected.
Why It's Important?:
The new scheduler link in v3 API offers improved performance. Using the updated link ensures that agents benefit from the latest updates and functionalities.
Keeping all links updated will maintain consistency across platforms, preventing any confusion for clients or users trying to access the scheduler.
Using the old links may lead to errors or issues that can affect scheduling efficiency and client interactions.
What Agents Need to Do?
A new and more improved UI for creating scheduler links.
Old Format Scheduler Page (UI):
New Format Scheduler Page (UI):
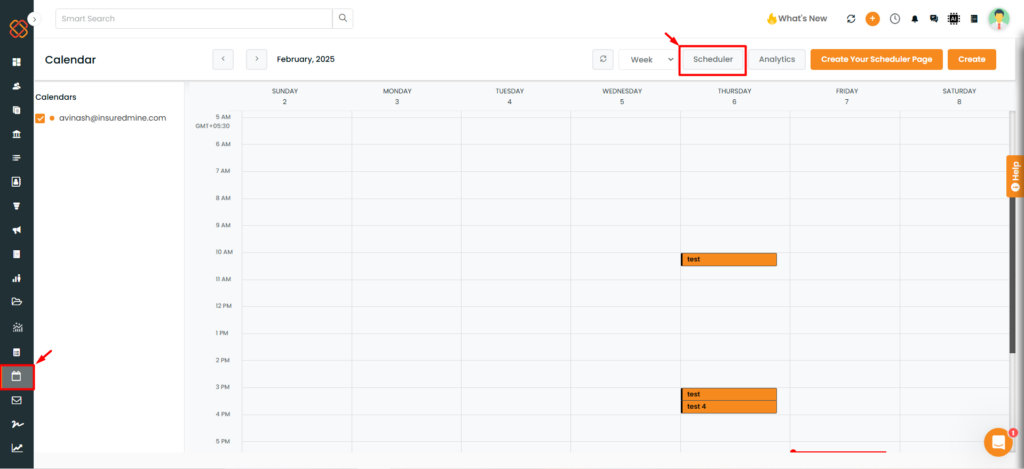
How to Generate a Scheduler Link?
Navigate to the ‘Calender’ Module.
Then, click on ‘Scheduler.’
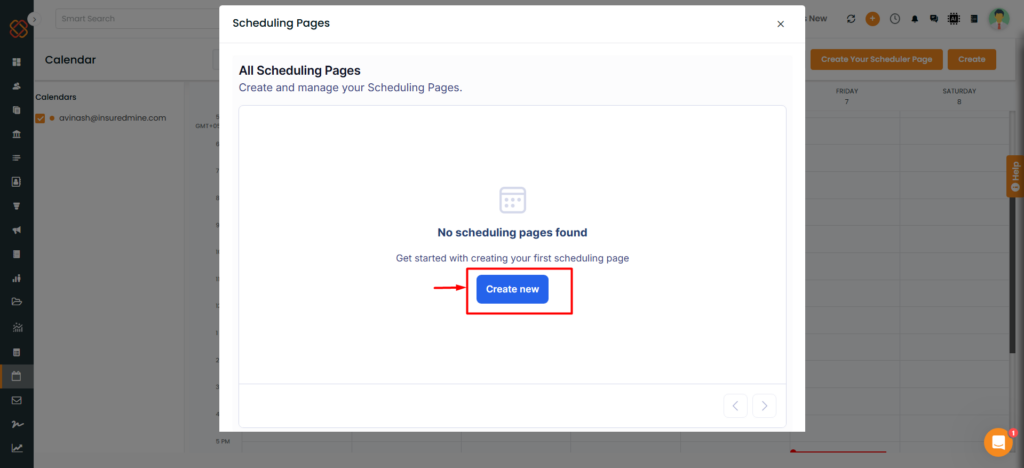
A Pop- up window will appear where you can create and manage Scheduler Links where you can quickly share your real-time calendar availability with invitees like prospects and clients.
If you have no scheduled events available on the scheduler page as shown in the above image, click to ‘Create New.’
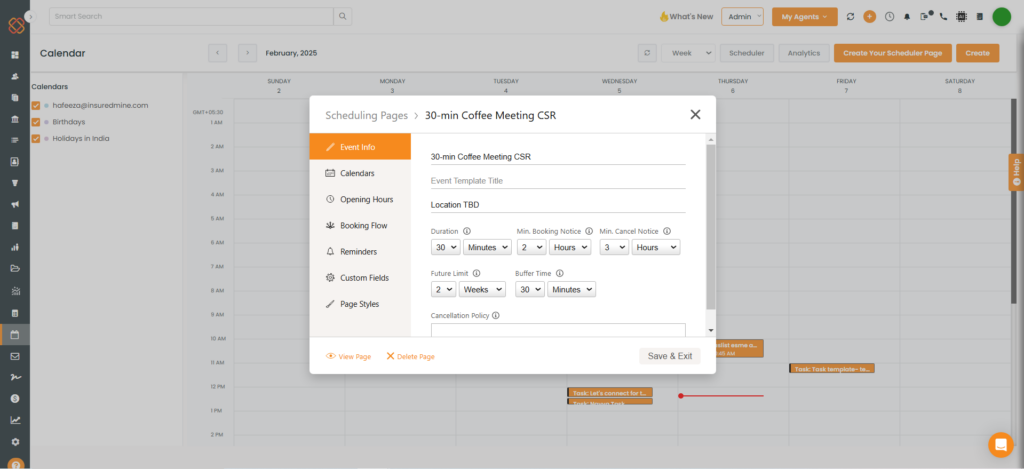
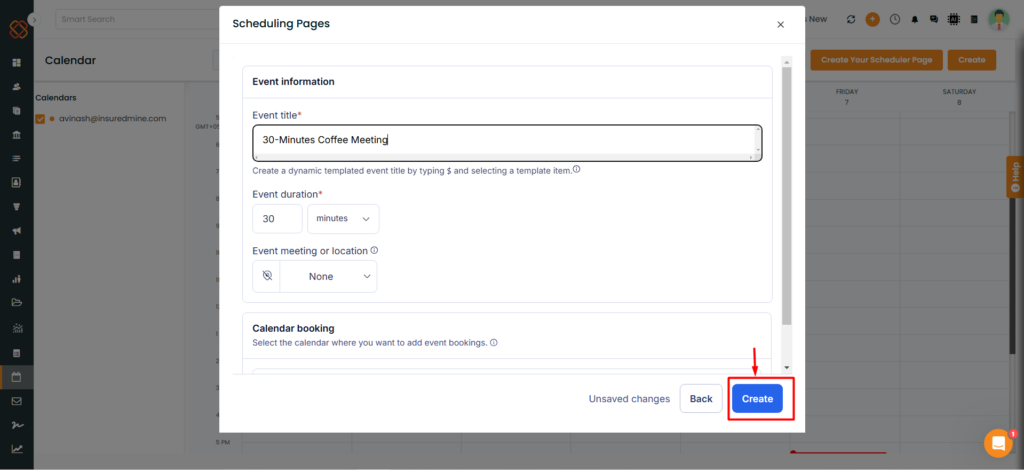
Add the Event Information details such as Title, Duration, Meeting or Location.
Then click, Create.
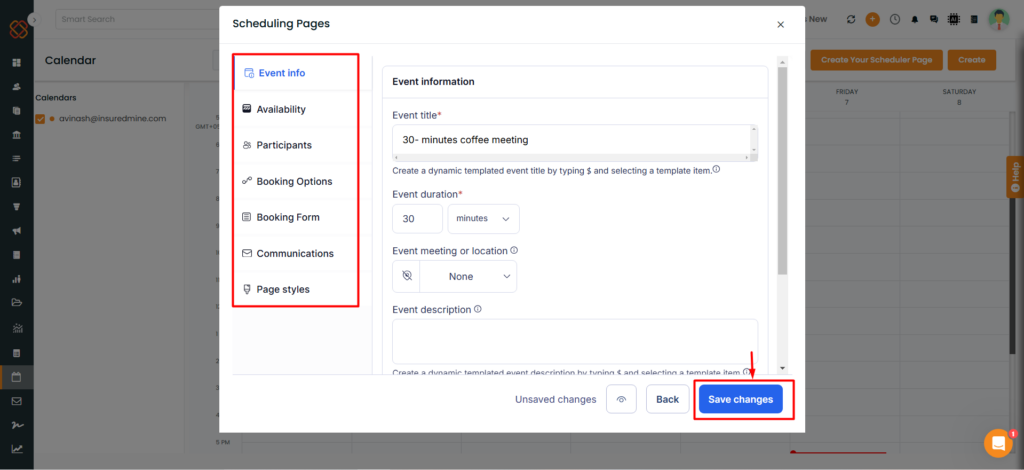
You will be redirected to the next page, where you can fill in any additional details if needed.
Click Save Changes. After saving, the created scheduler list will be visible on this page.
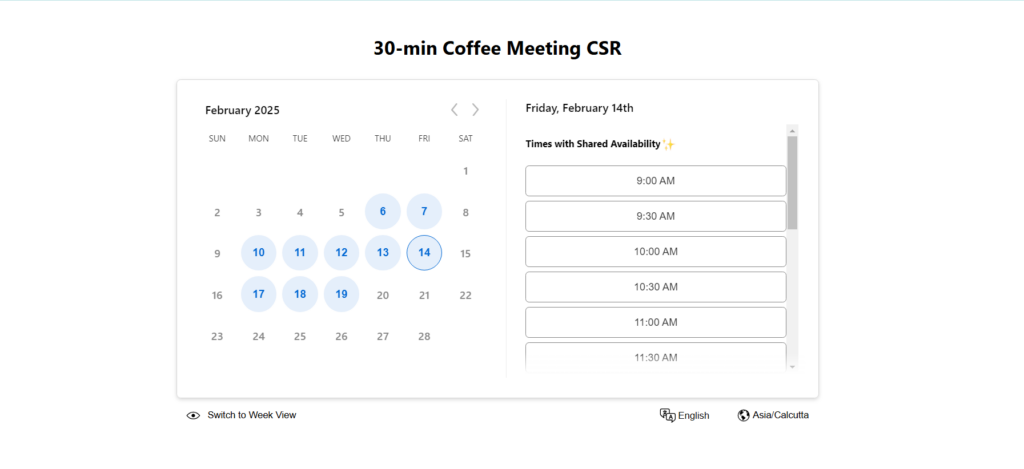
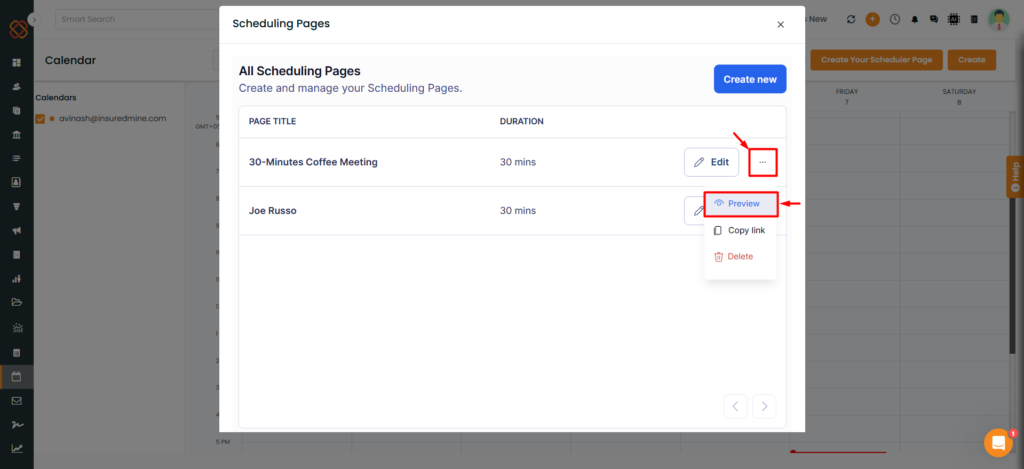
After creating the scheduler link for the event, click the three dots and select Preview to review it.
Once you click on Preview, you will see the date and time, which you can send to the client for booking based on their availability.
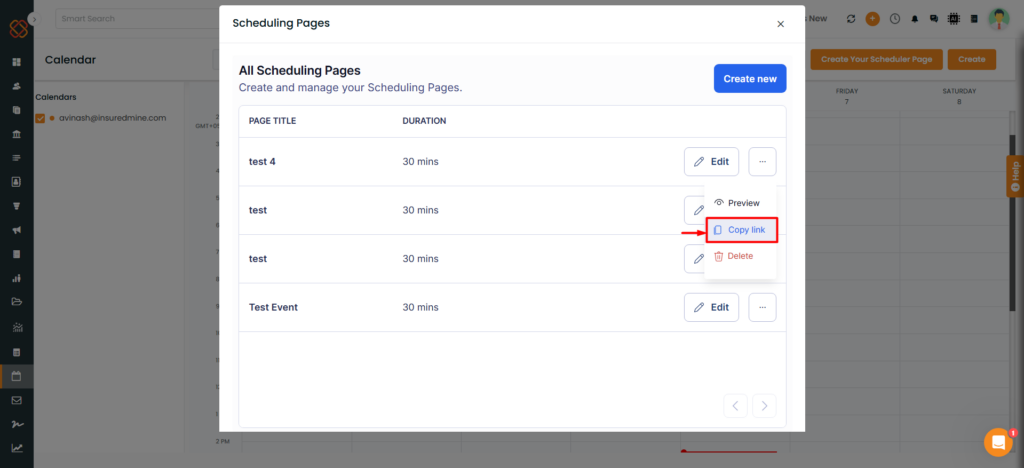
How to Copy New Scheduler Links
Once you have scheduled the event on the page, copy the scheduler link to share it.
Copy the new link and update it wherever you’re using the old scheduler link or have added the old scheduler URL, you’ll need to replace it with the new link and update in all the places where the old link was shared or embedded.
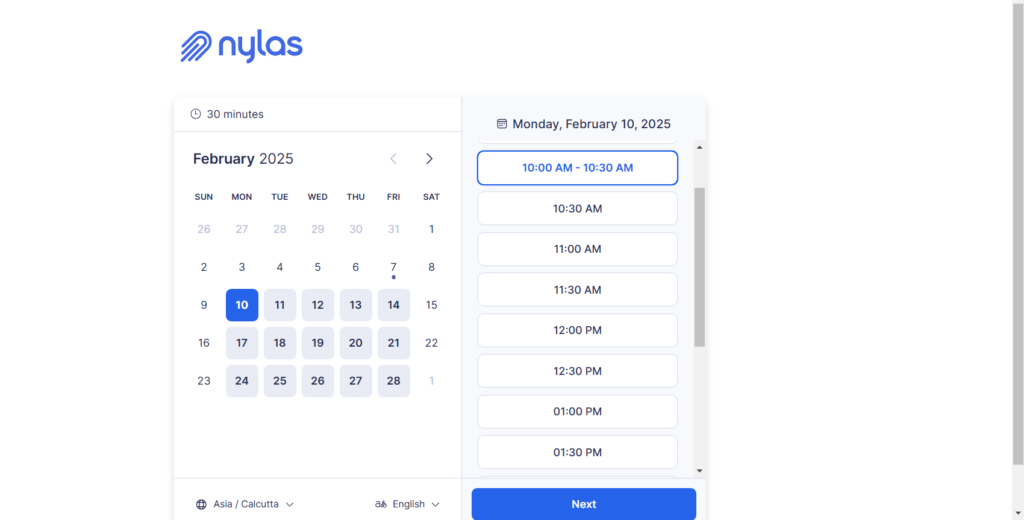
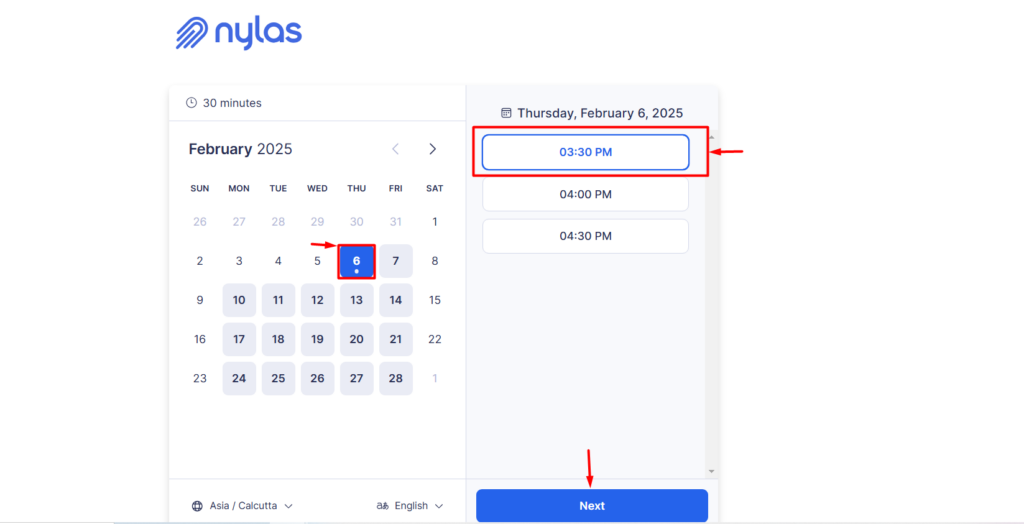
Once you have shared the link, the client will need to click on it and book a meeting based on their availability, as shown above.
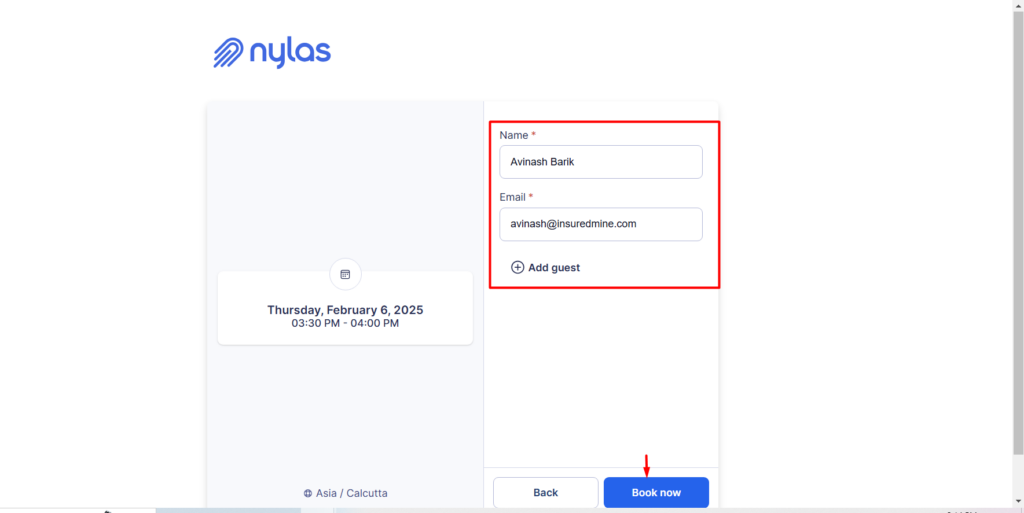
Next, they need to enter the name, email, and any guest details if any, then click “Book Now.”
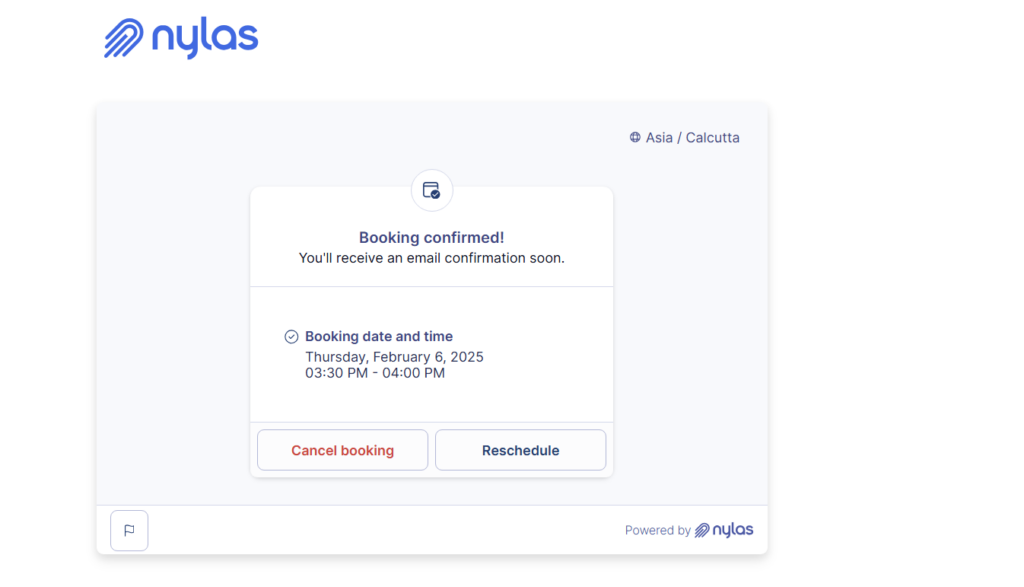
You will receive an email confirmation at the provided address, which can later be canceled or rescheduled based on your availability and preferences.